

If you’ve been following this blog for any length of time, you know that we are working on our forever home. Part of that process is renovating the fixer upper portion of that home (current house for us, but future garage and bonus area when the new home is built).
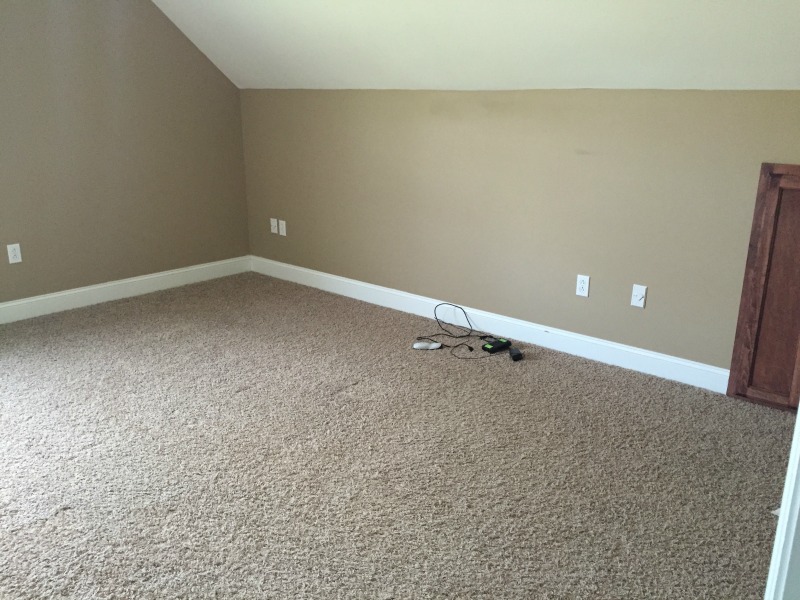
One of the first things we wanted to change in our fixer upper was the carpeted flooring. After years of being rented out, the carpet was filthy. It was stained, stinky, and just plain gross. We were also working on a slim budget. With a little DIY laminate floor installation, we took our flooring from this:
to this:
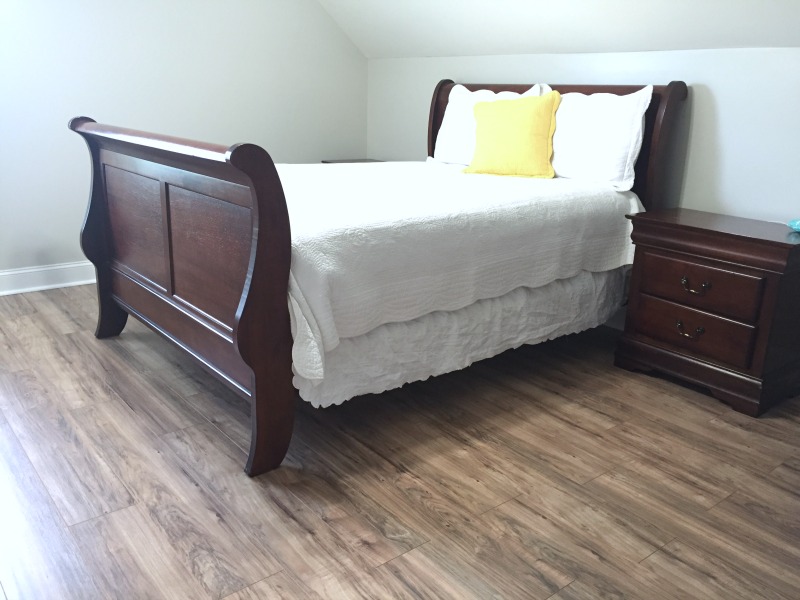
for under $1 per square foot. (<- insert salsa dancing lady emoji here!)
A few weeks before beginning our renovations, we took a trip to the beach with our friends. I fell absolutely in love with the flooring in the condo, and since the condo was owned by my friends parents, I was able to find out exactly what brand and color it was. Trafficmaster laminate flooring in Lakeshore Pecan. I was also able to test it out for an entire week to see how well it held up to our circus of a family. The answer? It didn’t scuff or scratch, even after a week of five kids and four adults running around with sand toys and dirty shoes. It cleaned up extremely easily, and it felt great to our feet.
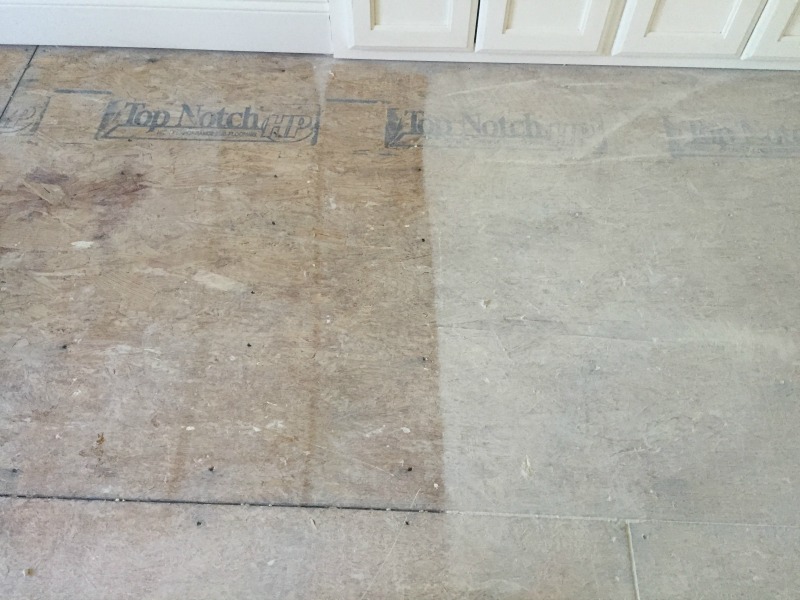
Once we made it back home and started the renovations, our first task was pulling up all that old, yucky carpet and making sure the subfloor was properly prepared. TIP: Before you lay any type of flooring, you need to make sure there are no screws or nails sticking up that will cause bumps in the new flooring. You will also want to clean and vacuum the floors before laying anything new. (See how dusty and gritty our floor was in the above photo? On the left is the cleaned floor-just what we need to lay our new laminate!)
As soon as our subfloor was ready to go, we took a trip to Home Depot to purchase our supplies. On the materials list:
*Trafficmaster Glueless Laminate Flooring in Lakeshore Pecan.
*Underlayment.
*Roberts Laminate Flooring Installation Kit.
*Rubber mallet.
*Duct tape.
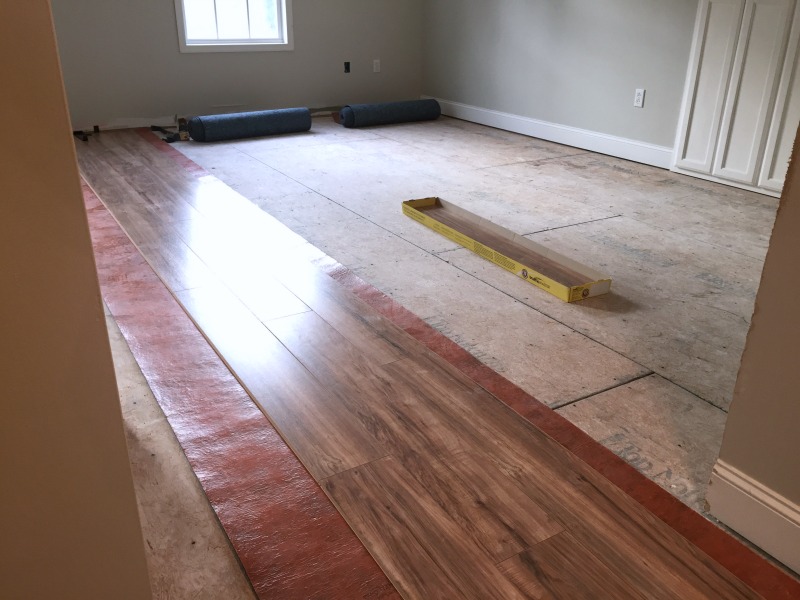
Step one in DIY laminate floor installation is putting down the underlay. This process is super simple—just spread it out (much like a blanket) and cut where needed. We used duct tape to connect the pieces across the floor, so nothing would shift or slide. (Tip: Don’t lay the entire floor of underlay at once. Begin in the middle of your area and lay a section of underlay. After you install your laminate on top of that, go back and lay another section of underlay. This helps keep everything clean and dust-free.)
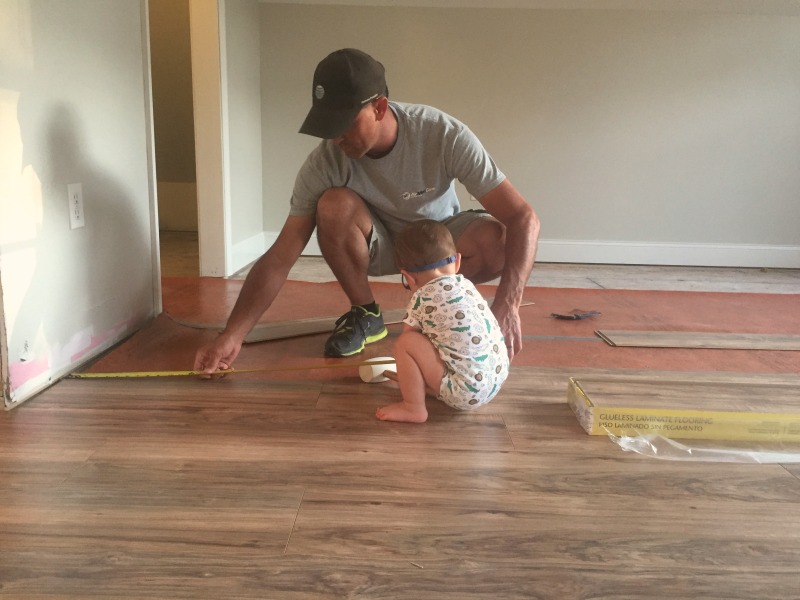
Step two is installing the actual laminate flooring. (Cute helpers are just a bonus!) You will want to start on the longest stretch of flooring near the middle of your area. In our case, we started on the stretch of floor that ran from the bedroom down the hallway. (Note: We already had baseboards down since this was a remodel. If you don’t have that, you may want to use a piece of quarter-inch paneling to create a gap between your flooring and the walls.)
The process is actually pretty simple. Once you have your first piece of flooring down, you just snap the other pieces together using the tongue and groove ends. This type of flooring doesn’t require any nails or glue—it just floats on top of the subfloor. (Tip: Before you lay each row of flooring, you need to think about your pattern. You want the seams to be staggered throughout the room. Also, the directions recommend not cutting any pieces smaller than 3 inches, so keep that in mind as well.)
When it comes down to the measuring and cutting of laminate pieces, we learned that using our actual boards to measure and cut worked better than using a tape measure. We would hold the laminate in place and mark directly onto the board itself.
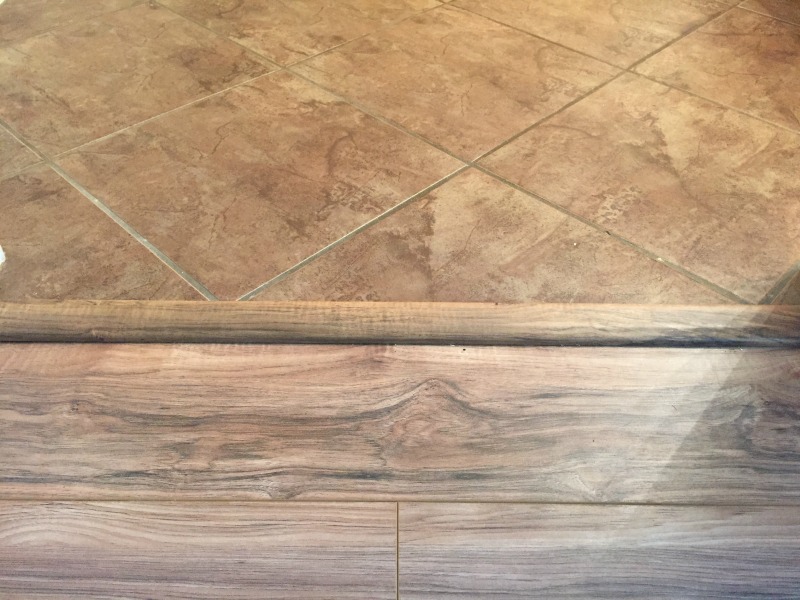
In one area, we have a transition from the laminate flooring to tile flooring. We purchased the Trafficmaster T-Mold piece and it fit right over the two different floorings for a seamless transition.
A DIY laminate floor installation is a super easy task to tackle and it really adds to your home. I highly recommend the Trafficmaster Laminate Flooring from Home Depot. It was simple to install ourselves and looks and feels amazing. We were able to install 1,000 feet of flooring in two days for around $1000. Beautiful floors that fit into my budget, stand up to my rough-housing circus of a family, and look beautiful? Now that’s what I’m talking about!


6 Comments
Mark Patterson
We like this post on your floors. We are getting ready to install them in our family room. I have a few questions:
1) How have they held up in your home? Any problems?
2) Have you installed them anywhere else in your home (i.e kitchen, dining room, etc.)? If you installed them in a wet area did you do anything differently?
Thank you!
Leticia
I just installed the lakeshore pecan floors on my entire condo, I would like to know, what color you used on your walls? thank you.
Momodu
Hi! What did you use to cut the laminate boards? I will be installing it next week and I am concerned about cutting. Will a pocket cutter suffice?
Thanks,
Doc.
Courtney
Hi there! We used a circular saw to cut ours. The boards are pretty thick.
Max Jones
I’ve always liked the look of laminate flooring! I’ve thought a little bit about doing it myself in our basement, but after looking at all the work that goes into it, specifically the measuring and cutting, I’m not sure I trust myself. I’ll have to talk to some pros to get quotes for our laminate flooring!
Courtney
Hey there! Thanks for stopping by. Installing any type of flooring requires a lot of measuring and cutting. A LOT. But if I can do it, anyone can 🙂