Building A House | Framing, Part 2

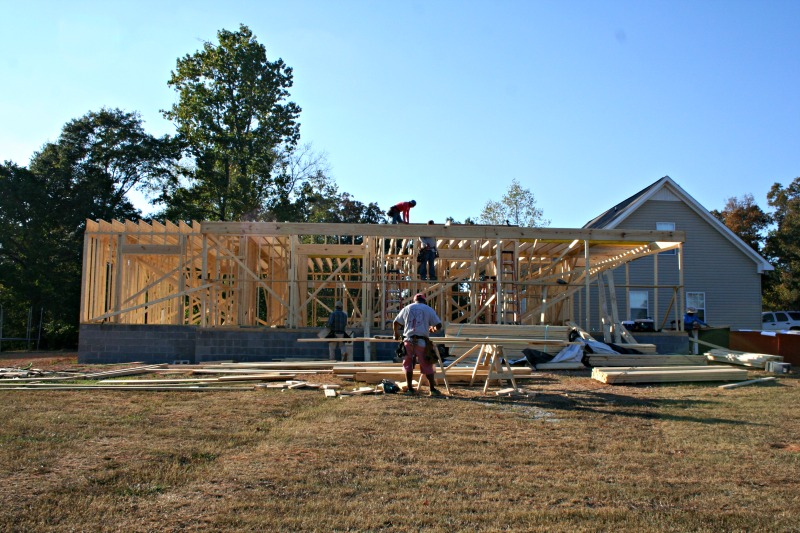
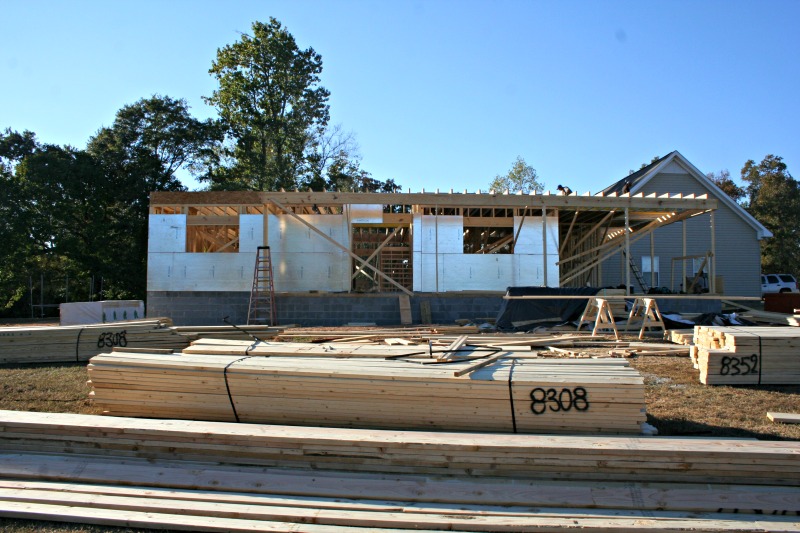
You guys, building our forever home is so surreal.  I have dreamed about this for years, and to see it coming to life is nothing short of mind-blowing.  When I last left you, the entire downstairs of our home had been framed up.  Parts were covered by tech-shield; bracing boards were scattered throughout.  It looked a bit like this:

building-a-house-framing-part-2-e

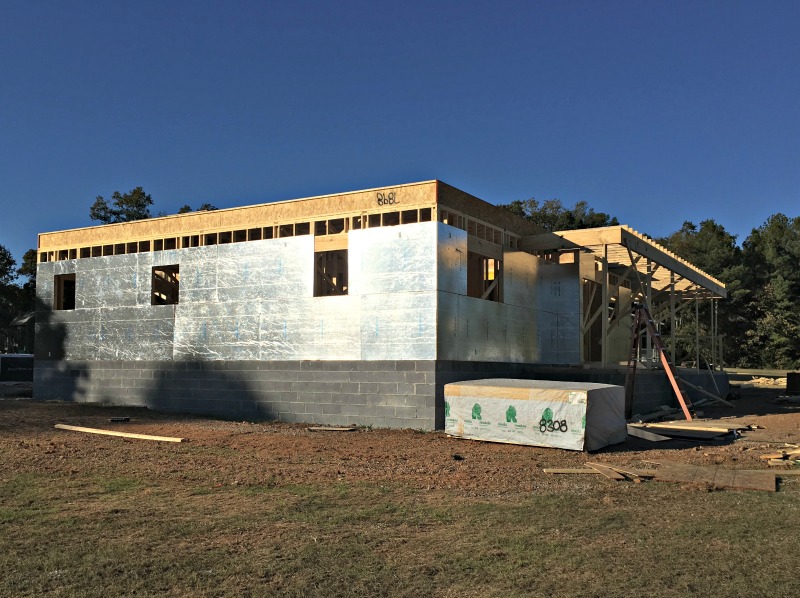
As soon as all that silver board (LP Tech Shield) was installed, most of the bracing beams inside the house came down.  There are still a few, but it’s not quite the maze/crossfit workout that it was before.

building-a-house-framing-part-2-d

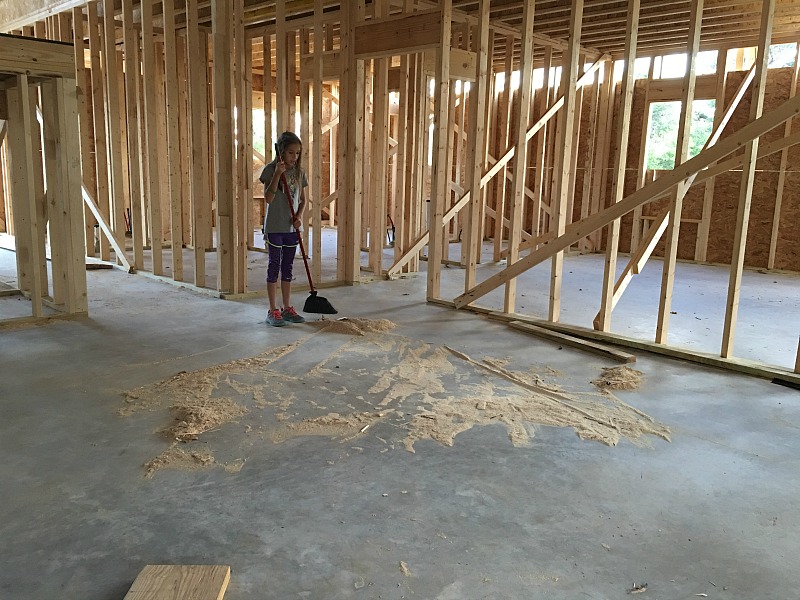
Most days, the kids and I go out and pick up trash.  My framer and his crew rock and they mostly pick up after themselves (—what?!?! It’s unheard of, I know.), but there are usually a few stray nails left out and some sawdust to be swept.

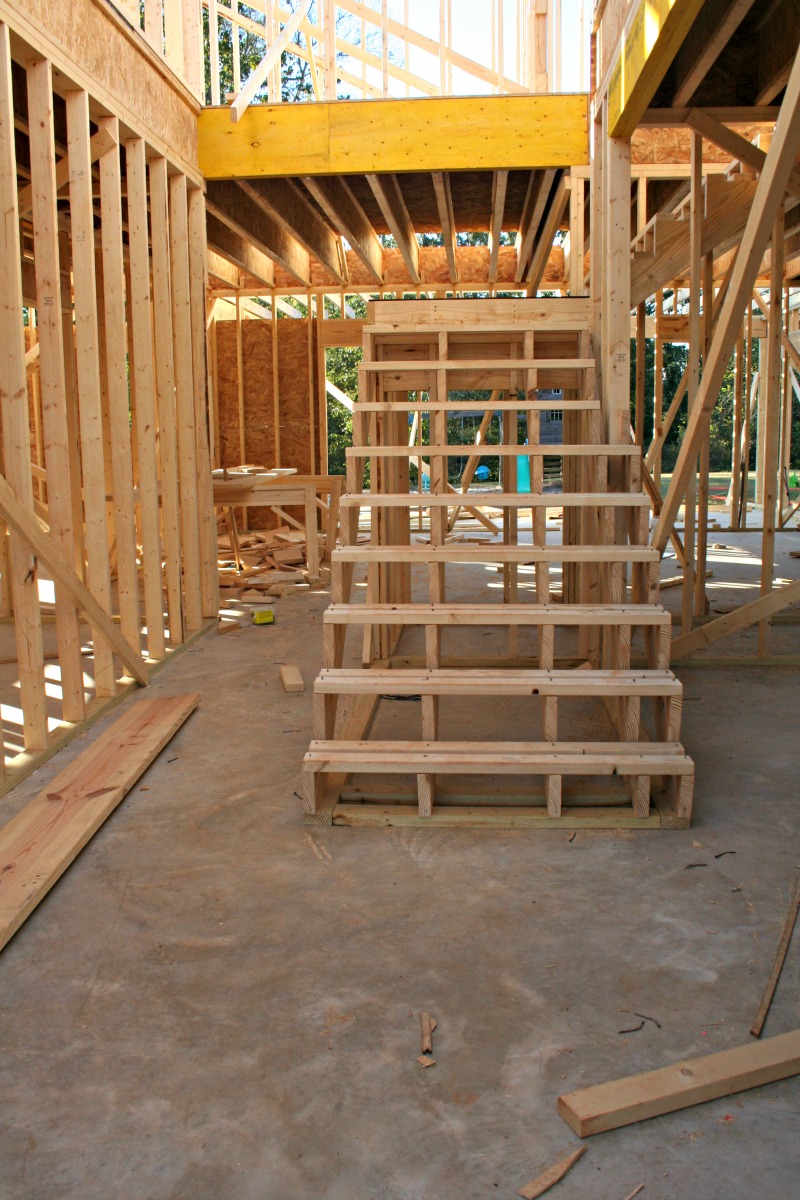
When the first floor was framed, the only way to go from there was up.

building-a-house-framing-part-2-a

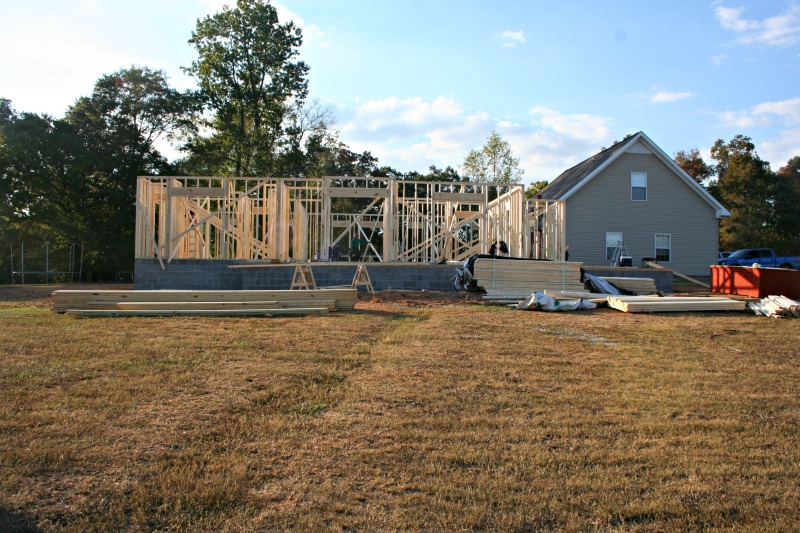
The rooms were framed up first, then the exterior walls.  These guys get so much done during the day that it’s hard for me to keep up with in-process shots. (Definitely not a bad problem to have!) After all the walls and most of the tech-shield was installed on the second floor, the framers started with the roof boards.

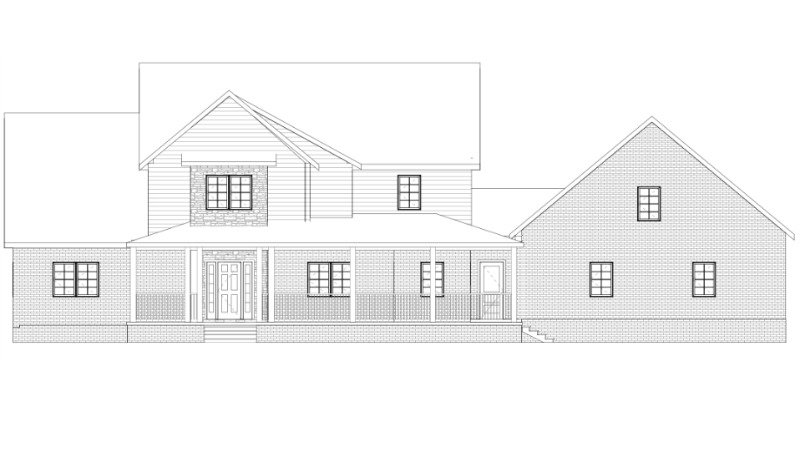
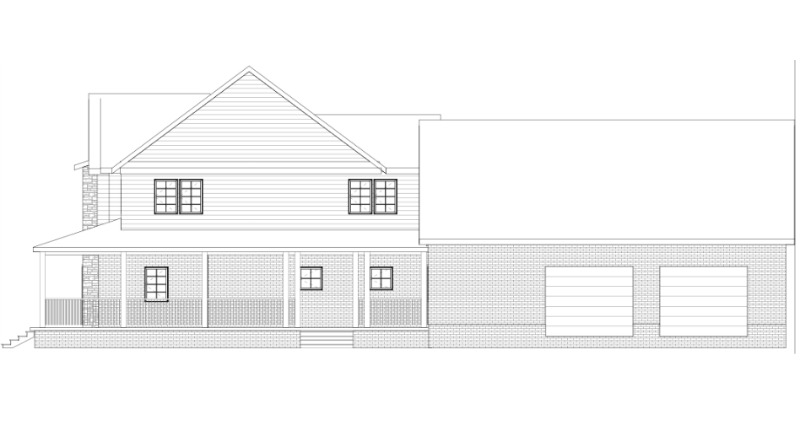
The photo above shows how the original, plan-drawn roof-line was supposed to look.  Our framer wasn’t super happy with the way it turned out in real-life, so he framed up something a little different and texted us a photo.  (Just one of the many reasons I love him and constantly sing his praises–he knows his stuff and he has vision.)

building-a-house-framing-part-2-c

We loved the change he made, so we opted to keep it.  I think it adds so much to the overall appearance of our house and it is something I never would have thought to change.  Or known how to change, even if I had thought about it!

When all the walls were framed and most of the tech-shield was on, some of the crew started laying tar paper on the roof.  This helps protect the wood in case of rain and serves as a base for the shingles.  For some reason, the tar paper makes everything look so much more finished to me.  Maybe because it gives the impression of shingles?!?

building-a-house-framing-part-2-b

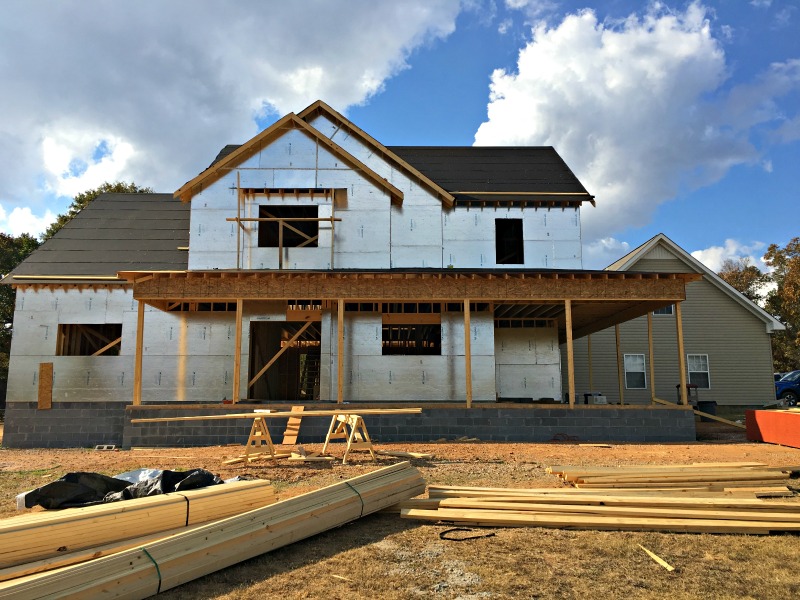
As of today, the framing is 98% complete.  This week, the framers will be finishing the carnish for the vinyl, installing windows and doors, and will begin installing the shingles.  (That will be a j-o-b, because they will lay shingles on the old part of house too.)

We still have a long road ahead of us before completion, but we’ve got a good jump on things.  It helps that our framers have been able to work ALL DAY EVERY DAY because of the extreme drought situation we are experiencing here in Alabama.  I know we need rain, and desperately.  But if it could hold off (and it looks like it will!) until the end of next week, I’ll join the rest of you in doing the rain dance!

Building A House | Framing, First Floor

building-a-house-framing-6Confession:  I have taken no fewer than 16 million photos of our house building process, and we are still only beginning.  Building a house is SO MUCH FUN and the process of framing has my excitement level through the roof.  We have walls–we have rooms.  We have stairs, for goodness sake.  I can thoroughly visualize where everything will be and it is pure awesomeness.

On my last house building post, I shared with you all about building our foundation.  Once the foundation was complete, we played the waiting game for about three weeks.  {Believe me when I tell you that our framer was worth the wait.  We adore him and if you are building anywhere in our area please let me know so that I can give you his contact information!}

building-a-house-framingThey started with the exterior walls on the first floor.  The wall above is our master bedrooom/ bathroom area.  Lots of bracing has to happen to keep these walls level/square with the rest of the house.  Right now, we can’t even walk through rooms without having to duck around sixteen different bracing boards. It’s like a maze/crossfit workout all rolled into one!

building-a-house-framing
Photo credits: Kyndall

It turns out that our plans weren’t the best.  There are lots of missing measurements and things that don’t quite add up.  Every afternoon, we’ve met with the framer and worked out kinks.  This error in measurement has worked in our favor every time except for one.  Our foyer area is much narrower than I wanted it to be.

building-a-house-framing-7-2

It’s big enough to walk through comfortably and big enough to get furniture through, just not as open as the house plans led me to believe.  In the big scheme of things, this is SO not a big deal, I’m just all about full disclosure!

building-a-house-framing-5Once all the exterior walls were in place, they began setting the interior walls.  (Confession:  I have made them move a total of three walls after they were framed.  One to make a closet bigger; one because the plans were messed up and we couldn’t actually fit a door into our bathroom (<–insert frustrated eye-rolling emoji here); and one to open up our foyer area as much as possible.)

building-a-house-framing-7

We chose LP tech-shield boards to sheath our house.  (They are not paying me for this shout-out, but maybe they should!)  Typically, builders use thin sheets of wafer board and then wrap it with plastic-like house wrap.  Tech-shield boards have a thin sheet of aluminum on the outside layer, which is much more energy efficient.  Their website claims to block up to 97% of a home’s radiant heat.

Once the first floor was done, they moved to the second floor and stared the whole process over.  Exterior, then interior.  Sheathing.  They are currently working on the roof and as soon as that is finished, the doors and windows go in.  I can’t wait to see (and share with you!) when all that is complete!

building-a-house-framingWith the first floor framed, I have been working on writing scripture on the studs and doorframes.  So far I have promised that we will serve the Lord (Joshua 24:15), that we will be hospitable to strangers (Hebrews 3:4), and my favorite verse–Isaiah 1:17.  I have plans for a Scripture/Blessing party as soon as the whole house is framed up/dried in.  I love the idea of every building block of our home being flooded with scripture by our friends and family.

How To Build A Rustic Barn Door Baby Gate

rustic-baby-gate-oal-1{This post is sponsored by the Home Depot.}

We ran into a little safety problem a few weeks ago–Jase loves to climb the stairs.  We knew we needed a baby gate, and fast!  We’ve tried those pre-made plastic gates before for our dogs and they just didn’t last.  We wanted to build something that would fit into our decor and be sustainable.  The solution?  Build our own rustic barn door baby gate.

rustic-baby-gate-oal-2

Today, I’m over at the Home Depot blog sharing our process.  Join me there!

rustic-baby-gate-oal-2-2

{Disclaimer:  I partnered with the Home Depot for this project.  The Home Depot furnished all supplies and even gifted us with some cool Ryobi tools to help with all our DIY needs!  I acknowledge that the Home Depot is partnering with me to participate in this project.  As part of the Program, I am receiving compensation in the form of product and services, for the purpose of promoting The Home Depot. All expressed opinions and experiences are my own words.  My post complies with the Word of Mouth Marketing Association Ethics Code and applicable Federal Trade Commission guidelines.}

Building A House | Foundation Work

I have a confession.  Building a house has taken over every little part of my brain.  There is no available space to think about anything else.  I have become a crazy person.  (If you know me in real life, I don’t need your comments regarding my craziness.  Thank you very much.)

We now have a foundation…. yay!  Since we were adding on to an existing structure, we hired a surveyor to come and “lay out” our house.  He used a transit to shoot the lines, so we know our house is as close to perfect as it can be.

building-a-house_-foundation

Once that was all done, our friend Brad came and began the foundation work.  They went to work with a mini-x to dig into the ground to create the footer.  The concrete trucks came out and poured the footer, which is what the block will sit on.

building-a-house_-foundation-1

building-a-house_-foundation-2

The next step was laying the block.  A crew came out and laid all the block out for the exterior walls of the house.  The top of all the block has to be level and placed just right so that the walls work out.

building-a-house_-foundation-3

We are building our house on a slab (instead of a crawlspace), so our plumber came out during the middle of the foundation process to “stub-out” our plumbing fixtures.  This process was a little stressful to me.  Once that concrete is poured, there is no changing anything plumbing related.  Well, without a huge expense, anyways.

As soon as the plumbing was set, our block layers came back out to fill-in the rock.  The whole foundation is filled with rock and then covered with a moisture barrier to keep any water from getting to the house.  Concrete wire is placed inside the concrete to keep it from cracking.

building-a-house_-foundation-4

Justin and my dad slipped out after dark (thanks to soccer schedules) to rough-in a little electrical.  We will have a few outlets in the floor and these had to be put in before the concrete was poured.

building-a-house_-foundation-5

Last, but not least, the concrete was poured and finished.

building-a-house_-foundation-6

Our next step is framing the actual house, but our framer is a few weeks out before he can make it to us.  So for now, we wait.  {And I may or may not go sit on that concrete in my future living room and just grin like a crazy person.}

building-a-house-foundation-work-2

Building A House: The Bank Process

Building A HouseYou guys, it is finally happening! As of last week, we closed on our construction loan and are ready to start actually building our forever home.  I am so excited I could squeal.  Actually, I have already squealed quite a few times.  I keep looking at Justin and saying “I AM SO EXCITED!”

Can I talk to you for a minute about this whole bank process, though?  It’s been like hurdling one mountain after another.  We had our first appointment with the bank on June 9.  We filled out the loan application, were assured we both had excellent credit and were given an estimated loan closing of the first of July.  Enter aforementioned mountains.

First, there was an issue with our income tax paperwork.  The wrong pages were copied and we had to contact our accountant who, naturally, was on vacation for that entire week.

Then, when the lawyer was doing title work, a random ten-thousand dollar mortgage popped up.  This mortgage wasn’t showing as something we owed, but it was a paperwork issue that needed to be cleared up before we could move on.  The problem was that the actual mortgage was issued under First American Bank, which is no longer a working bank.  First American has been absorbed by PNC Bank and when I contacted PNC Bank they could find no record of this mortgage in our name.  PNC Bank can’t release a mortgage that it can’t find.  In the end, our lawyer was able to write an affidavit that made the mortgage null and void.  All this fuss over a little paperwork added about three weeks onto our loan process.

THEN, when we were {this} close to closing on our loan, the construction inspector discovered that our driveway doesn’t actually belong to us.  If you have followed this blog for any length of time, you know that we are building right in the middle of family land.  We already built a structure on this land eight years ago and the driveway wasn’t an issue.  We have legal right of way to our property, it just isn’t where the actual driveway is.  Originally, the bank insisted that we either move the driveway or have the existing right of way deeded to us.  Either of these options would have taken MONTHS.

After several days of begging and pleading, we were able to get yet another affidavit written by our lawyer in which we agreed to have this right of way issue taken care of within 60 days.  This affidavit allowed us to go ahead and close on the loan and start building, rather than waiting for that legal issue to be resolved. PRAISE JESUS!

On Wednesday afternoon, Justin and I met our loan officer at the bank and essentially signed our life away.  (I’m kidding, of course, but when you sign a 30-year mortgage it sort of feels like you are signing your life away!)  Our first contractors came out the following day and staked out the block line of our house.  I have bright pink flags in my yard designating where each corner of our home will be.  It’s not much, but it’s progress.  And progress makes me happy!

DIY Laminate Floor Installation

DIY Laminate Floor Installation

If you’ve been following this blog for any length of time, you know that we are working on our forever home.  Part of that process is renovating the fixer upper portion of that home (current house for us, but future garage and bonus area when the new home is built).

One of the first things we wanted to change in our fixer upper was the carpeted flooring. After years of being rented out, the carpet was filthy. It was stained, stinky, and just plain gross. We were also working on a slim budget. With a little DIY laminate floor installation, we took our flooring from this:

DIY laminate floor installation 1

to this:

DIY laminate floor installation 1

for under $1 per square foot. (<- insert salsa dancing lady emoji here!)

A few weeks before beginning our renovations, we took a trip to the beach with our friends. I fell absolutely in love with the flooring in the condo, and since the condo was owned by my friends parents, I was able to find out exactly what brand and color it was. Trafficmaster laminate flooring in Lakeshore Pecan. I was also able to test it out for an entire week to see how well it held up to our circus of a family. The answer? It didn’t scuff or scratch, even after a week of five kids and four adults running around with sand toys and dirty shoes. It cleaned up extremely easily, and it felt great to our feet.

DIY Laminate Floor Installation

Once we made it back home and started the renovations, our first task was pulling up all that old, yucky carpet and making sure the subfloor was properly prepared. TIP:  Before you lay any type of flooring, you need to make sure there are no screws or nails sticking up that will cause bumps in the new flooring. You will also want to clean and vacuum the floors before laying anything new.  (See how dusty and gritty our floor was in the above photo?  On the left is the cleaned floor-just what we need to lay our new laminate!)

As soon as our subfloor was ready to go, we took a trip to Home Depot to purchase our supplies. On the materials list:
*Trafficmaster Glueless Laminate Flooring in Lakeshore Pecan.
*Underlayment.
*Roberts Laminate Flooring Installation Kit.
*Rubber mallet.
*Duct tape.

DIY Laminate Floor Installation

Step one in DIY laminate floor installation is putting down the underlay. This process is super simple—just spread it out (much like a blanket) and cut where needed. We used duct tape to connect the pieces across the floor, so nothing would shift or slide. (Tip: Don’t lay the entire floor of underlay at once. Begin in the middle of your area and lay a section of underlay. After you install your laminate on top of that, go back and lay another section of underlay. This helps keep everything clean and dust-free.)

DIY Laminate Floor Installation

Step two is installing the actual laminate flooring.  (Cute helpers are just a bonus!) You will want to start on the longest stretch of flooring near the middle of your area. In our case, we started on the stretch of floor that ran from the bedroom down the hallway. (Note: We already had baseboards down since this was a remodel. If you don’t have that, you may want to use a piece of quarter-inch paneling to create a gap between your flooring and the walls.)

The process is actually pretty simple. Once you have your first piece of flooring down, you just snap the other pieces together using the tongue and groove ends. This type of flooring doesn’t require any nails or glue—it just floats on top of the subfloor. (Tip: Before you lay each row of flooring, you need to think about your pattern. You want the seams to be staggered throughout the room. Also, the directions recommend not cutting any pieces smaller than 3 inches, so keep that in mind as well.)

When it comes down to the measuring and cutting of laminate pieces, we learned that using our actual boards to measure and cut worked better than using a tape measure. We would hold the laminate in place and mark directly onto the board itself.

DIY Laminate Floor Installation

In one area, we have a transition from the laminate flooring to tile flooring. We purchased the Trafficmaster T-Mold piece and it fit right over the two different floorings for a seamless transition.

A DIY laminate floor installation is a super easy task to tackle and it really adds to your home.  I highly recommend the Trafficmaster Laminate Flooring from Home Depot. It was simple to install ourselves and looks and feels amazing. We were able to install 1,000 feet of flooring in two days for around $1000. Beautiful floors that fit into my budget, stand up to my rough-housing circus of a family, and look beautiful? Now that’s what I’m talking about!

DIY Laminate Floor Installation

Fixer Upper, In Progress

The number one rule of tackling a fixer upper:  It will take much longer than you planned.

We moved in with my parents at the end of February, planning to stay no longer than two months.  Here it is May and we are looking at at-least two more weeks of work.

First, the renters stayed a little longer than originally planned.  There were issues with their new rental, so they asked to stay a few more weeks.

Then, everything else just takes time.  And when you have three kids and you know, a life, it takes a little longer.  And, in all honesty, we haven’t been rushing ourselves.  If we have one thing to our advantage, it’s that we have time.  There have been no late night work nights and sometimes, on weekends, we skip painting and take the kids fishing.  And that’s ok.

Fixer Upper In Progress 1So far, we’ve removed the yucky old carpet and knocked down a wall.  That wall has been patched up (as well as other holes in the sheet rock from renters).

Fixer Upper In Progress 4We have cleaned all the floors and gotten the upstairs ready for new flooring.  There were so very dusty from the sheet rock work.  See this before and after vacuuming photo for further proof:

Fixer Upper In Progress 5

We are currently painting.  And painting.  And painting.  Everything had to be primed first.  The ceilings have to be painted.  We haven’t even gotten to the actual paint color yet.

On the new house front, we are still rounding up prices from different constructors. (<–Is that even a real word?  You know, people who do construction-type work….plumbers, brick layers, etc.)   Justin and my dad will do a lot of work themselves, but we still need estimates for things like materials and plumbing and brickwork.  We are ‘planning’ to have all that together in the next two weeks so that we can make the dreaded trip to the bank, but if there is a theme to this post at all it’s that things rarely go as planned.

fixer upper- in progress

My Pinterest-Inspired Home

As soon as Justin and I were married, I starting dreaming about our forever home. I cut pictures from magazines and printed them from websites and stored them in a cute little binder. Periodically, I would sit and go through that binder, pulling out ideas I no longer liked and reorganizing it. Enter Pinterest and it is so much easier to organize inspiration. Now, don’t get me wrong. I still love flipping through my Southern Living and HGTV magazines, but I no longer cut out the images I love. I find them online and pin those babies.

For the past year or so, I’ve had a secret (gasp!) Pinterest board titled “Alabama Acres.” I’ve rotated lots of pins through that board and now that we have our plans, I’ve narrowed my inspiration down even further. Today, just for kicks, I would like to share my Pinterest-Inspired home with you, my lovely readers.

Kitchen.

via Studio McGee
via Studio McGee

Light flooring, white to-the-ceiling cabinets, light countertops, farmhouse sink, and an inconspicuous range hood….all the things I want in my forever kitchen!

Living.

living
via Instagram #thebrandlsbuildahouse

Understated fireplace, wall-to-wall built ins, tv above mantle.  All that’s missing from this picture is a giant, comfy sectional sofa.

Laundry room.

My Pinterest inspired home
via Zillow

Our laundry room plans have windows above the washer and dryer, much like this.  I envision lockers similar to the ones above, as well.  The verdict is out on the sink though.  I can’t decide if a laundry room sink is necessary or not.  I’d love your suggestions!

Master bathroom.

Master Bath
via Hallsley

This layout is very similar to the plans for our master bathroom.  I love the gray floors and gray walls, the freestanding tub, full glass shower, and lots of windows.  (PS:  My grandmother keeps telling me I’m going to hate having so many windows one day.  I want windows on windows on windows right now.)

Guest bathroom.

Guest bath
via MandyJeanChic

I love the idea of having a plank accent wall in our half bath.  I think I would want it white, because I’m so drawn to the airy feeling of lots of white.


Several of you have asked where we are right now on the house-building front.  I think I owe you a little update! We’ve finalized our plans and are currently getting prices from the different people we will be working with.  Honestly, our main focus right now is getting our fixer upper ready to move back into.  Things are going so very well at my moms (see this post from my sister!) but we are ready to have our own space back.  And I’m going to need to get my summer clothes out of storage if we are there much longer!

Fixer Upper: Demo Day

In continuance with my Fixer Upper references, we had a full-fledged Demo Day at the old/new house.  (Building a new house is a whole process around here.  Before we can begin the new house part, we have to repair the old house part.  Step by step, y’all.)  Carpet was ripped up, walls were torn down, body parts went through sheetrock–it was just like Chip and JoJo on Fixer Upper, Alabama style.

Our first step was to get all the yucky, smelly carpet pulled up.  Justin and I pulled all the carpet and padding.  Our carpet was cut into semi-small sections already, so rolling it up wasn’t an issue.  If you are pulling up carpet in a bigger area, I would recommend cutting it.  Carpet is heavy, y’all.

Fixer Upper Demo Day

Justin had to take care of some electrical things (moving wires and whatnot) from the wall we were going to remove, so I was given the lovely job of removing all the tack strips and staples from the floor.  (I definitely drew the short stick, you guys.  Those things are no joke!  I was sore for days.)

Fixer Upper Demo Day 7

With the wiring gone and the nasty flooring removed, it was time to tackle that wall.  Now, in hindsight, it would have been much easier to do this Justin’s way.  Had we methodically cut the sheetrock and removed it piece by organized piece, clean up would have been a breeze.  But we did it my way.

Fixer Upper Demo Day 1

We used regular hammers and sledgehammers and child laborers.
Fixer Upper Demo Day 6

There may have even been a body part or two make its way through that sheet rock.  An entertaining time was had by all, that’s for sure.  A few bruises may have shown up, as well.

I even talked Justin into having a little fun, although clearly, his heart wasn’t in it. =)

With the sheet rock down, it was time to cut out the studs.  We were/are hoping to reuse those, so Mal and I went through and removed all the nails and screws from each board before they were cut.

Fixer Upper Demo Day 4Fixer Upper Demo Day 5

So how about an overview of our progress so far?

Here are our stairs before:

Fixer Upper Stairs

And in progress:

Fixer Upper Demo Day 8

The master bedroom, before:

Fixer Upper MasterGuest

And in progress, carpet-less, as a make-shift storage space for those reusable trim pieces and door frames:

Fixer Upper Demo Day 10

The bedrooms, before:

Fixer Upper Bonus

And in progress, as the future bonus room:

Fixer Upper Demo Day 9

Our to-do list:

  • Remove all carpet, padding, etc.
  • Put in new flooring.
  • Remove wall and doorways between two bedrooms.
  • Paint every square inch of sheet-rock (this even includes ceilings!)
  • Seal concrete floors downstairs.   Edited:  We have not done this, but upon further inspection, have decided against re-sealing the floors.  As a garage, they will be fine as is.
  • CLEAN!

We are aiming to be completely finished with the Fixer Upper portion of our forever home in two weeks.  We’ll move in and begin the new portion.  It’s definitely a process, but at least it’s a fun process!

Building A House: Tips for Choosing A House Plan

Building A House: Tips For Choosing A House Plan

Oh my goodness, y’all.  When we first started talking about building out at the farm several months ago, we spent hours pouring over house plans.  I imagine choosing a house plan to be the single most difficult thing of this whole process.  Floors, counter-tops, cabinets– all that can be changed if I decide I don’t like it in 15 years.  The house plan stays forever.

Justin joined Pinterest and sent me no fewer that seventeen hundred pins.  From the start, Justin and I sat down together and wrote out a wish-list of things that we definitely wanted in our forever home.  Things that are non-negotiable.

On that list were:

  • a big front porch.
  • open living area/kitchen.
  • big pantry.
  • his and hers closets.
  • walk-in closets for the kids.
  • four bedrooms.

It took several meetings, numerous emails and phone calls, and a few weeks, but we finally worked out a plan that we both loved.  My go-to quote has been:  “We can put a man on the moon.  I know we can build this house the way we want it.”

Our house will sit way back off the road, and at an angle, so the side of the house will be seen much more than the front.  We wanted a plan that would be just as pretty from the side as from the front.  Here you have the front of our house:

Building A Home, Choosing A Plan

We will be using brick, siding, and a little rock there in the middle.  Here is the side, where you drive up.  This is the view visitors will have most often.  (In reality, our garage doors will be bigger than shown–when we built the original structure, Justin had them frame for double garage doors instead of single-sized ones.)

Building A Home, Choosing A Plan

And here is our lower level interior plan.

Building A Home, Choosing A Plan

Remember, the garage is already there, so we’ll just be connecting through that mudroom area.  That closet-looking space to the rear of the laundry room is a storm shelter.  Above the garage is a bedroom, a bathroom, and a bonus area.  This is the second floor interior plan.

Building A Home, Choosing A Plan

We had full-size doors going into each of the attic areas.  We will floor those spaces and use them for storage.  You can NEVER have enough storage.

The only way to get to the bonus area is through the stairs in the garage. The old upstairs and the new upstairs aren’t connected in any way.  I like that when the kids have company, they can go there and play instead of having to go into their bedrooms.

Building A House: Tips For Choosing A House PlanNow that we have been through this process and are on the other side, here are a few tips.

  1. Hire an architect.  After pouring over literally thousands of plans, we didn’t find a single one that had everything we wanted.  We liked one exterior and another lower level and still another upstairs.  When you have the plans drawn, you can combine all the things you like.
  2. Make a list of non-negotiables.  Some things, like the location of our stairs, didn’t really matter to me.  Other things, like the separate his and hers closets in the master, did.  It helped having the list of things that really mattered before we ever started drawing plans.
  3. Measure and measure again.  Each draft we received of our plans, we measured out the sizes of rooms and hallways to get a feel for them.  On one draft, a walk-in closet was 2 feet wide.  Just so you know, that doesn’t work :).  By measuring all the rooms out and looking at them in real life, we knew that the plan was as close to perfect as possible.

Have you built a house?  Do you have any advice, suggestions, or tips to share with me?