A Garden Story and My Favorite Squash Casserole Recipe

squash casserole

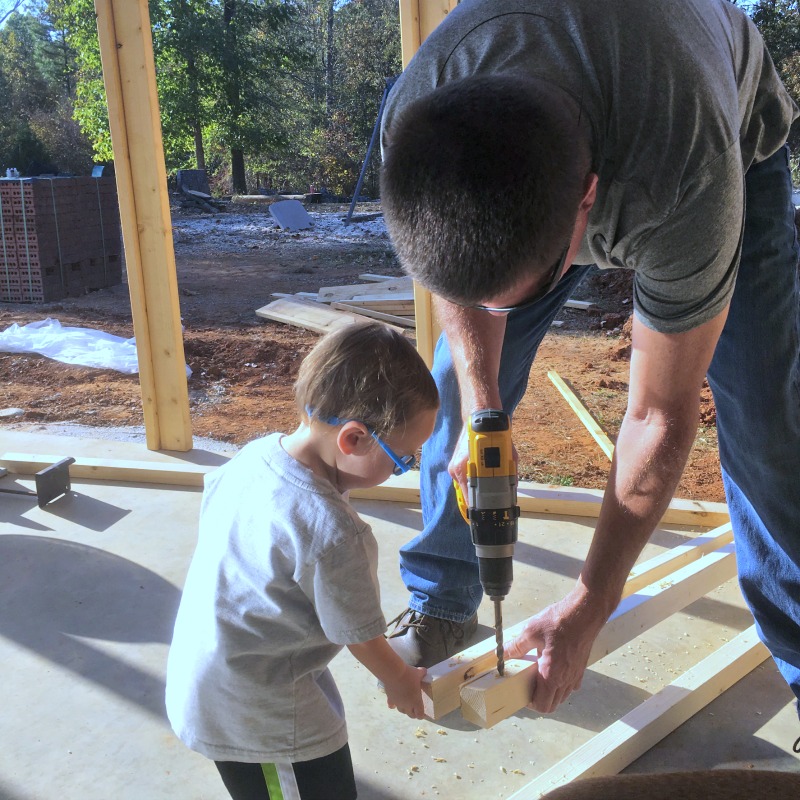
The Friday before Easter, as is a farmers tradition, I got out and planted our summer garden.  Justin was super busy building our forever farmhouse, so I did all the garden work myself, with three kids underfoot.  I tilled the soil and raked the soil and planted my heart out.  The kids and I planted corn, cucumbers, zucchini, squash, okra, sunflowers, tomatoes, peppers, and watermelon.

My little plants started poking up from the ground and we were so excited.  I had great plans for all the food I’d be cooking this summer and putting up for the winter.  And then, Justin, in all his goodness, went out one evening before it was supposed to rain and threw tons of fertilizer on our garden.  The problem was, the predicted rain didn’t come.  Not until after my precious budding garden had sat out an entire day under the scorching summer sun and all that fertilizer burned up half the garden.

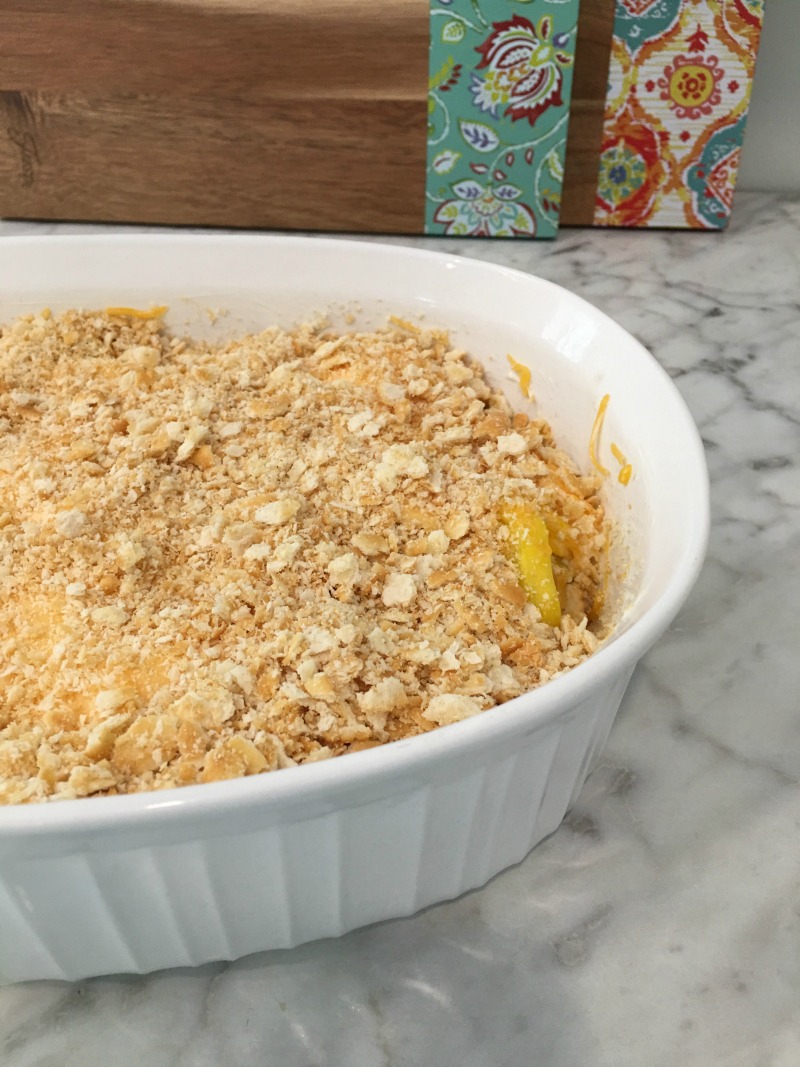
We worked really hard, but we lost all of our tomatoes, peppers, and watermelons.  Half the corn died.  A few zucchini and a lot of okra.  The plants that did survive are now thriving, though.  We have six, HUGE squash plants, a handful of okra plants, a few rows of corn, a couple sunflower plants, and two cucumber plants.  What we have left is a ton of squash, but not much else.  I feel like Forrest Gump, only with squash–we’ve had fried squash and sautéed squash and squash with onions and baked squash, but our favorite is squash casserole.

squash casserole

Squash Casserole

4 medium squash, sliced
8 oz. shredded cheese
1/4 onion, diced
2 heaping tablespoons Mayo
1 sleeve Ritz crackers
4 tablespoons melted butter

1.  Slice squash.  Submerge squash slices in boiling water for 4-5 minutes, or until tender.

2. In an oven-safe container, combine squash, cheese, onion, and mayo.

3.  Crumble Ritz crackers and sprinkle them over the top.

4. Melt butter and pour over the Ritz cracker crumbles.  Be sure to spread the butter evenly or the crackers will burn easily.

5. Bake at 350 degrees for 30 minutes.

Now, help a sister out.  What is YOUR favorite squash recipe?  I’m contemplating making pickled squash, but I need to hear from someone who’s tried it so I’ll know if it’s worth my time! 🙂

Farmhouse Kitchen and Pantry Tour with Quality Bath

Friends, we are FINALLY moved into our forever farmhouse and it has taken us a solid week to get mostly situated. Justin and I are sleeping on an air mattress because we haven’t purchased a bedroom suite yet. Originally, we had zero cell phone service and zero internet in the new house. We bought this cell phone booster and bumped our cell phone signal from zero bars to four-and-five bars.  Our garage is still packed full of stuff that needs to be sorted and put away. But for the most part, we are in!  Hallelujah!

Today, I want to share one of my favorite spaces with you–our farmhouse kitchen and pantry.

Farmhouse Kitchen:

Farmhouse Kitchen Tour

Those yellow stools look so gorgeous in photos, but in reality, they come off more mustard/gold in color.  I’m considering painting them a bright turquoise color.  That goes on the bottom of our to-do list though, so who knows when it will actually happen.  =)

The door to the right of the fridge leads to our mudroom.  It usually stays open, and so far, the majority of our guests come in that way.

Farmhouse Kitchen Tour

I am really loving my double-ovens.  I didn’t know how often I would use them, but I have cooked something in both of them for almost every meal so far.

Farmhouse Kitchen Tour

Farmhouse Kitchen Tour

When I first began dreaming of my farmhouse kitchen, I knew I wanted a big apron-front, white fireclay sink.  I searched everywhere.  When I found this one at Quality Bath, I knew I wanted it in my farmhouse kitchen.

Farmhouse Kitchen Tour

Farmhouse Kitchen Tour

It’s 36 inches wide and a single bowl.  I don’t wash many dishes by hand, but on the rare occasion that I do, the single bowl works fine.  It’s width allows me to wash on one side and rinse on the other.

I am extremely pleased with the quality and service from Quality Bath.  My sink was delivered within two weeks of ordering.  It is extremely heavy and very durable.  The fireclay feels like it would chip easily, but so far, it is holding up really well (even with three kids tossing in dishes every day!).

Farmhouse Pantry:

Farmhouse Kitchen Tour

In addition to the usual suspects (you know, food) our pantry hosts the microwave, toaster, and my Keurig coffee maker.  I love that these small appliances can stay out and easily accessible, but still hidden from view.

Farmhouse Kitchen Tour

I think I’ll put some decorative plates on those little shelves on the sides of the microwave.  Maybe some of my painted pottery pieces or something.  Right now, there is nothing in the cabinets below or above the microwave, but I’m sure I’ll find something to go there eventually!

Farmhouse Kitchen Tour

Justin and my dad built these shelves and I adore the way they turned out.  Those OXO containers (the three on the left) are my favorite.  They are a bit pricey, though, so I’m slowly adding to my collection.

We are relishing being in our new home and this space is definitely one of the most-used.  Having the tools and space needed to cook actually makes me enjoy cooking!

Disclaimer:  This post is in partnership with Quality Bath.  As always, all opinions are my own.

Forever Farmhouse Update No. 9

farmhouse updateYou guys, I apologize for the lack of posts. We are in a mad rush to get this house completed and it is taking up every free second that I have.  Next Wednesday or Thursday, we will have our final inspection. Then, on May 23 we are closing on this bad boy!! Praise JESUS, am I right? =)

Installing the garage doors was quite an event. If you’ll remember, we are currently living in what will be the future garage. On Tuesday, we cut out the holes where our garage doors would go. It went from this:

To this:

And finally, on Thursday, to this:

We spent Tuesday and Wednesday nights with a sheet of plastic separating us from the great outdoors. It was great! =)

Our cabinet guy built and installed the closet units for our master closets.  We have his and hers closets, which was one of my “must-haves”  WAY back at the beginning of this whole process.  I opted for shelving and drawers, so my closet looks like this:

Justin just wanted shelves, with no drawers.  His closet looks like this:

Today, Justin is working on leveling up the front yard and spreading out hay.  Since we are out in the county, we don’t have to do any “real” landscaping right away.  I hope to have our local nursery come out and give me suggestions as to what I should plant, and where.

This weekend we are hitting the ground running–finished up the last remaining tasks and hopefully, getting most everything cleaned up and ready to move in.  The concrete people are coming next week to pour our sidewalks and a slab for us to park on.  I am super excited about molding the kids’ handprints into the concrete–how funny is that?

Kyndall and I made a spontaneous stop by Southern Style Furniture earlier this week and found the perfect living room set, so that’s another item marked off my list!  I have fingers crossed that as soon as we close on the 23rd, we can start moving in and getting settled.  YAY!

Our running to-do list:

  • Clear land. completed August 25, 2016
  • Pour footer. completed August 30, 2016
  • First plumbing and electrical rough-in. completed September 7, 2016
  • Pour slab. completed September 10, 2016
  • Framing. started October 3 and completed October 20, 2016
  • Roofing. completed October 30, 2016
  • Second plumbing rough-in. completed November 11, 2016
  • HVAC rough-in. completed November 17, 2016
  • Brick skirt and steps. completed November 18, 2016
  • Vinyl siding. completed March 9, 2017
  • Garage doors. completed March 11, 2017
  • Electrical. completed December 5, 2016
  • Hang insulation. completed December 15, 2016
  • Final plumbing (connect toilets, sinks, dishwasher, etc.)  completed April 25, 2017
  • Install and finish sheetrock.  completed January 13, 2017
  • Install crown molding and window trim. completed April 5, 2017
  • Tile shower. completed March 2, 2017
  • Paint.  completed February 7, 2017
  • Install lights. partially completed–most of the lights are in, just not all.
  • Floors. completed March 25, 2017
  • Install flooring trim. mostly completed.
  • Install stair and balcony railing.  mostly completed
  • Cabinets.  completed April 12, 2017
  • Hang bathroom mirrors. partially completed
  • Install closet hardware. partially completed.  Our closets are finished, just not the kids’ closets.
  • Touch-up paint.
  • Clean.
  • Move in.
  • Host all-the-things. =)

Farmhouse Master Bathroom Update

Farmhouse Master Bathroom

This post in partnership with Floor & Decor.

You guys! Our plumber came yesterday and installed all of our toilets, hooked up all the faucets, and finished all the other plumbing things. We now have working bathrooms and running water and are even closer to being finished with our forever farmhouse! YAY!

Today, I am sharing our farmhouse master bathroom update with you. I was super excited to be able to partner with Floor & Decor on the tile for our floor and shower. If you are ever building and/or remodeling and need new flooring, check them out for sure!  I went for a store tour several months ago and was amazed at their selections.

Walk-In Shower:

Farmhouse Master Bathroom

Farmhouse Master Bathroom

Farmhouse Master Bathroom

Just so you know, all white tiles are not the same.  Floor & Decor’s subway tile is the brightest, cleanest white available on the market.  When I picked up subway tile samples from other stores, they were much more yellow/ivory in color.

Double Vanity:

Farmhouse Master Bathroom

One thing missing from this room still are mirrors.  I haven’t quite decided if I want to go with one big mirror all the way across the length of the vanity or two smaller mirrors with some decorative piece in the middle.  (Feel free to leave me your opinion in the comments!)  We have these lights to go above the sinks, but they haven’t been installed yet.

PS: If I were a professional blogger, I would have cleaned those floors before taking this picture.  {Hides face in embarrassment.}

Soaking Tub:

The only other item still needing to be completed is the tile around the tub.  We will use the same white subway tile to build a backsplash around our soaking tub to help protect the walls.

I can’t wait to be settled in and getting ready in this bathroom.  I dream of long soaks in that tub with candles and a book, but let’s be realistic–I have kids and that probably won’t happen for a while =)  Maybe I can at least squeeze in some steamy, relaxing showers of a morning though, which is the next best thing!

*This tile project and post in partnership with Floor & Decor.  The tile for this project was complimentary but all opinions are my own.

4 Natural Products I’m Loving, Vol. 1

natural products

natural productsHey guys! If you follow me on social media, you know that I’m playing nurse this week to a recovering patient.  (If you don’t follow me on social media, my youngest daughter had her tonsils removed on Monday!)  Coincidentally, the events leading up to her tonsillectomy are the same events that led to the research behind this post.

I’ve been researching natural products.  I’ve become very aware of how many chemicals we put into, on, and around our bodies daily.  (Yes, this is the same girl who had Botox and dermal filler and drinks Mt. Dews religiously.  I’m not giving those things up, but every little bit counts, right?)

I started a little over a year ago slowly replacing our normal products with natural products.  I did not (and will not) throw away all our cleaning and makeup products and go purchase all new natural ones–I just wait until a product is empty and I replace it with a natural product.  (I don’t have the budget for a cleansing like that!)

After a year of this process, I’ve found quite a few favorite natural products.  I’m sharing some of those with you today, and I’ll share even more later. {Affiliate links are used in this post. Shopping these links will result in a few extra pennies for OAL at no extra cost to you.  As always, your support of OAL is appreciated!}

4 Natural Products I’m Loving

natural productsMethod Cleaning Products.  Method is probably the natural product I’ve used the longest.  It was the first thing I bought last year (maybe even longer than that) when I started thinking about using natural products.  I love the way it smells–Clementine and Grapefruit are my favorites.  I love the way it cleans.  The spray works well on everything–my laminate countertops, my wood kitchen table, our concrete floor, my mirrors.  Our cleaning lady (oh how I miss her!) was converted after seeing how brightly the Method made my microwave shine!

natural productsTom’s of Maine toothpaste.  Tom’s leaves my mouth feeling super squeaky clean–almost like when you leave the dentist office.  I’ve been using this toothpaste for several months and I immediately noticed a whitening of my teeth.  Tom’s doesn’t have that minty fresh taste I’ve gotten used to with other brands, even though the label boasts “mint” flavor.  It doesn’t taste bad;  it doesn’t actually have a taste at all.  Tom’s has a strawberry flavor for the kids that I haven’t been able to convince my girls’ to try yet, but I’m still working on that!

natural productsBurt’s Bees lip products.  I would be embarrassed to count how many Burt’s Bees lip products we have lying around.  The lip shimmer is my favorite, but I have the “real” lipstick, too.  In addition to being natural, this product feels (and smells!) so good.  I love how much softer it makes my lips feel.  The lipstick and lip shimmer both have color in them and the color stays on just as well as any other lip product I’ve tried (except for that 12-hour Cover Girl stuff!).

natural productsDickinson’s Original Witch Hazel.  I use this as a toner on my face, after my face wash.  (My face wash isn’t yet natural, but I am open to your recommendations!) I noticed a huge difference in my face following my acne facial a few months ago, but within days of using this witch hazel as a toner, the remaining bumps disappeared.  {Disclaimer: I think hormonal acne is something I (and most women) will always deal with, but if I can reduce the amount of time that hormonal acne is visible, I call that a win!}

A few other natural products I’m trying, but with-holding judgment on are:

A service that I have enjoyed using to explore natural products is Grove Collaborative.  Grove Collaborative Right now, if you sign up using my link, you’ll receive $10 off your first purchase PLUS a Method superstars set retailing at $30 for FREE when you spend $20.

I’m curious–do you use any natural products in your home?  I would LOVE to hear which natural products you love, OR which ones you’ve tried and disliked.  

Floor & Decor Store Tour

floor and decor store tour

This post is sponsored by Floor & Decor.  As always, all opinions are my own.

floor and decor store tourWe are nearing the point in our house-building process where we are installing things–flooring, wall tile, cabinets.  After finding tons to love on the Floor & Decor website, I reached out to them about a blog partnership and they agreed!!  They invited me up for a full Floor & Decor store tour and I was, quite literally, floored (pun intended!).  We found every single thing we needed….. and more.

Floor & Decor has over 60 stores across the United States.  They carry hundreds of different flooring options–ceramic, porcelain, travertine, marble, hardwood, bamboo, and laminate.  They also carry a wide variety of back-splash materials, sinks, tools, and counter-tops.  All your flooring and decor’ing needs (<–I’m on a roll today, y’all!).

The Tour.

When Justin and I arrived for our Floor & Decor store tour, we were greeted by the store manager and the design team specialist.  Floor & Decor has in-store designers who will work with you on any project, for free.  Our designer, Theresa, was a huge help when it came to picking out tile and designing our master bath, which is the project we are partnering on.

If you are anything like me and struggle with visualizing things, Floor & Decor is the store for you.  Throughout the store, there are displays of miniature rooms to help you see what different flooring/tiles/grouts look like together.

Theresa sat down with us and went over our measurements and vision.  She walked around the store with us and pulled items that she felt matched the vision I had.  We spent the morning making different arrangements of floor tile and wall tile and pencils and decorative pieces.  It was so much fun and I was able to see the project even better.

Theresa pulled out these tiny pieces of grout samples so that I could select our grout color easier.  Being able to see the actual grout with our tile choice made me so much more confident in my decision!

As we were walking out, I spotted this clearance tile and fell in love!  I knew it would look just fantastic in our laundry room in a herringbone pattern.  And do you see that price tag?  That’s 88 cents per square foot… not bad Floor & Decor, not bad.

I can’t wait to share our master bathroom project with you, but in the meantime, if you have any of your own projects going on, I suggest a visit to Floor & Decor.

Forever Farmhouse Friday Update No. 6

farmhouse update

farmhouse update

We are slowly ticking through our forever farmhouse checklist over here.  Please pay attention to those columns on the front porch.  Don’t they look so much better than those 2×4’s from the last farmhouse update?  We also installed our lantern lights there by the front door and one more by the side door.

farmhouse

Our porch ceilings make me so happy.  The front porch is covered in blue slated vinyl.  The back porch is covered with corrugated metal.  I love how the different materials/colors add interest to our outdoor living spaces, where I am sure we will spend 90 precent of our time!

Our exterior lights are all installed–LED canlights, two outdoor ceiling fans, and the lanterns by the doors.  The HVAC is connected, so now we can heat (or cool) the house while we are painting.

Our sheetrock is complete and after several nights of Justin and my dad coming in looking like ghosts (from all the sheetrock dust), the house is finally clean enough to start painting!  They actually started the primer on the ceilings a bit last night, but they will do more paint this weekend.  We are also planning to start the tile in our shower and bathrooms this weekend. (And by we, I mean Justin.)

We are aiming for an early March move-in date, so fingers crossed everything works out and we can make that!

Our running to-do list:

  • Clear land. completed August 25, 2016
  • Pour footer. completed August 30, 2016
  • First plumbing and electrical rough-in. completed September 7, 2016
  • Pour slab. completed September 10, 2016
  • Framing. started October 3 and completed October 20, 2016
  • Roofing. completed October 30, 2016
  • Second plumbing rough-in. completed November 11, 2016
  • HVAC rough-in. completed November 17, 2016
  • Brick skirt and steps. completed November 18, 2016
  • Vinyl siding. near completion.
  • Electrical. completed December 5, 2016
  • Hang insulation. completed December 15, 2016
  • Shutters.
  • Install and finish sheetrock.  completed January 13, 2017
  • Tile shower.
  • Paint.
  • Install lights.
  • Floors.
  • Cabinets.
  • Clean.
  • Move in.
  • Host all-the-things. =)

DIY Farmhouse Table

DIY Farmhouse Table

DIY Farmhouse Table
We are approaching the end of construction on our forever farmhouse, and every farmhouse needs a farmhouse table. I don’t know if you have shopped for a farmhouse table recently, but those babies can be expensive. Lucky for me, I have a talented husband and a great relationship with The Home Depot.  So we decided to partner with the Home Depot and build our own DIY farmhouse table.

DIY Farmhouse Table
DIY Farmhouse TableThe entire process was super simple and extremely economical.  For a step-by-step guide and all the details on how to DIY your own farmhouse table, meet me over at The Home Depot blog.

Reality Check: Messy House Tour

Messy House Tour

We are counting down the days until move-in day and I am all kinds of crazy. Trying to make last-minute design decisions and plan the move and pre-organize all the things. Before we move, I thought it would be fun to share a current messy house tour with you guys. Because you know I love to keep it real around here.  (And because I loved the idea when I saw it on some of my favorite blogs:  Bower Power and Young House Love.)

We are currently living in the future garage of our forever home. We are crammed into a 2-bedroom, 1-and-a-half bathroom construction zone.

Messy House Tour

This is the view of our living room’s “good side”.  Not great, but not too bad.  A few toys scattered about, a blanket thrown haphazardly over the couch.  But overall, a livable space.Messy House Tour

And then, behind the couch.  This area contains all the tools being used to construct our forever home.  There are also four new toilets in that pile, as well as a 36″ farmhouse sink.  A boxed-up security system, three ceiling fans, two industrial pendant lights.  Oh, and an often-used treadmill (<–insert sarcasm here).

Messy House TourThe kitchen is the one bright spot in our house.  It stays relatively clean, with only a wayward tool or two charging on the counter.  And a cow on the floor.  (This photo was taken right before dinner, which explains the cups and plates and pitcher of tea.)

Messy House Tour

The kids room is surprisingly decent, considering all three of them share one large space.  Since Jase’s bed is never slept in, it has become a haven for extra blankets and stuffed animals and blue jeans.

Messy House Tour

Our bedroom is a disaster zone.  Storage bins, boxes full of can lights, random wall art, dirty husband socks.  Everything finds it’s temporary home here.

Regardless of all this mess, I love our temporary home.  I love that we all congregate in the usable area of the living room and watch Gilmore Girls.  I love that we are living right here in this construction zone, even though I will never get rid of all the sheetrock dust.  And I really love that in less than two months (fingers-crossed) we will be moving into our forever home and transforming this place back to the garage that it was meant to be!

Forever Home Friday Update, No. 2

Forever Home Friday Update No 2I decided last week that a “Forever Home Friday Update” was the best way to keep you up to date on the little happenings at the house.  You know, until I have more big news to share, like brick or vinyl siding or CABINETS!

Before the weekly update, let me give you a little recap:

  1. Our footer was poured and finished.
  2. The framing was completed:  first downstairs and then upstairs.
  3. Front and side doors, windows, and shingles were installed.

Studs, walls, and floor boards have been saturated with God’s Word.  My mom and sister invited our family and several friends over to “bless” our house, and we most definitely received a blessing.  For all that goodness, check out my instagram posts.

The exterior still looks very similar to last week, with the exception of that 2×2 board that wraps around the lower part of the house.  This board will separate the brick from the vinyl.  (There is a more technical explanation of this, but I don’t know it!)

“Worker man” Jase was in on all that action, of course.forever-home-friday-update-no-2-c

forever-home-friday-update-no-2-d

The plumber came and installed most of the rough-ins, which include our bathtubs.  {Jase was SO excited about his tub shower!! He just had to crawl in and play around for a while!} The plumber has also installed all the pipes that will go in the walls.  We are waiting on a few more faucets to come in and the plumbing rough-in will be complete.

forever-home-friday-update-no-2a

We don’t have anything wired just yet, but Justin strung work-lights throughout the downstairs.  I was so strangely excited about this.  Justin called me a weirdo, but it just makes the house feel even more real or something!

forever-home-friday-update-no-2-b

A lot of what was planned to happen this week got pushed back to next week, so I’m hoping to have lots more to share on the next update.  The brick mason will start (hopefully) on the brick and fingers-crossed, we will get all the doors and windows ready so that we can lock up.  {Honestly, I’m anxious to get those doors finished so we can close them up and keep the dogs out. They think the house is their very own personal place right now!}

The gas company is scheduled to come out and run our gas lines and the HVAC guy is scheduled to do his thing.  Justin and my dad are beginning the wiring process this weekend.  We are still trying to decide whether we should install the vinyl siding ourselves or pay someone to do that.  Money versus our time and all that.

And since I’ve included several photos of Jase, I’ll leave you with this one of my girls.  They are growing up so dang fast and it just makes my heart hurt sometimes.

picmonkey-image

PS:  We have been loving some SnapChat filters lately…. they are so stinking fun!

PPS:  To see all our building posts, you can click on the “Categories” menu to the right.  Select “Building” and you’ll see everything I’ve shared so far.  If you want to make sure you don’t miss anything, find the “Subscribe” option in the right sidebar.  Enter your email address and all my posts will be delivered right to you!