DIY Farmhouse Table

DIY Farmhouse Table

DIY Farmhouse Table
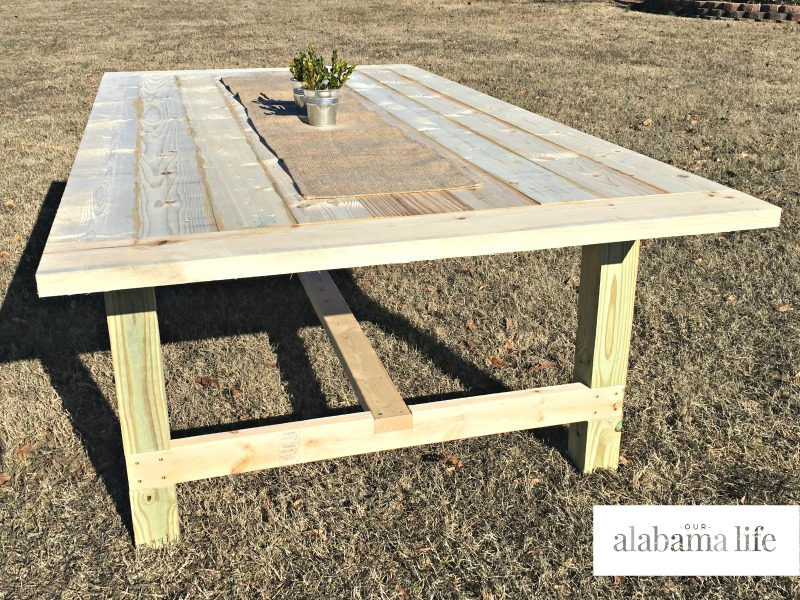
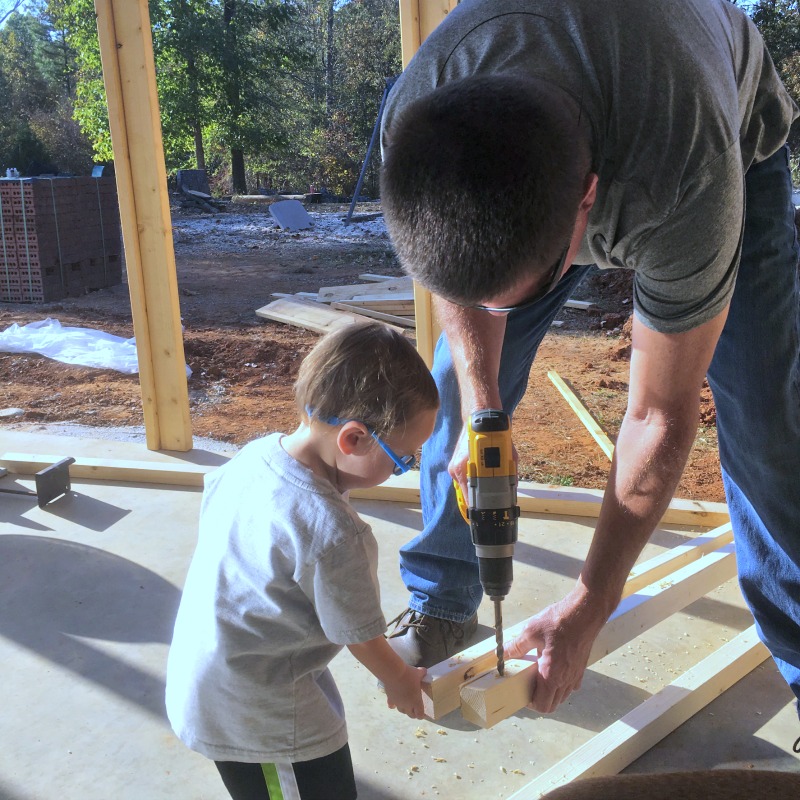
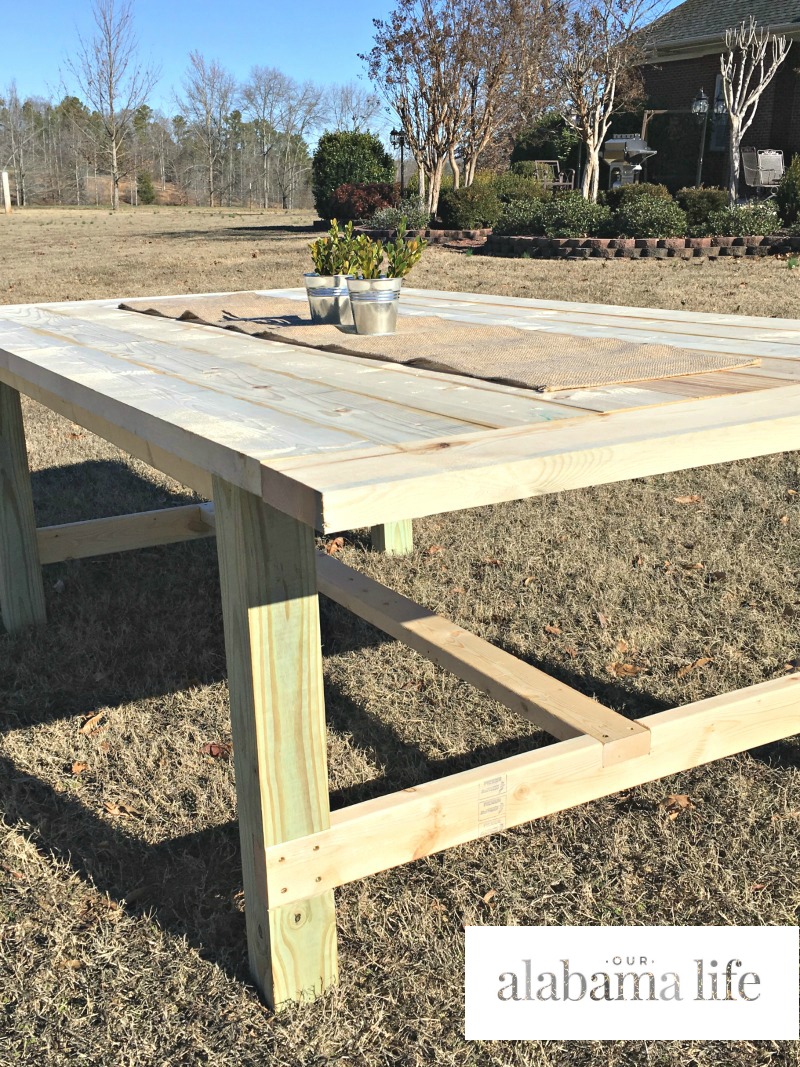
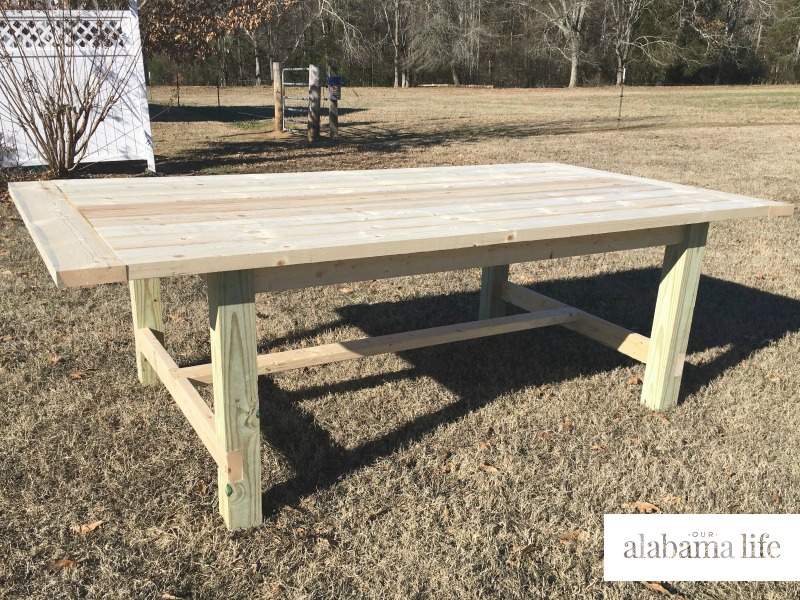
We are approaching the end of construction on our forever farmhouse, and every farmhouse needs a farmhouse table. I don’t know if you have shopped for a farmhouse table recently, but those babies can be expensive. Lucky for me, I have a talented husband and a great relationship with The Home Depot.  So we decided to partner with the Home Depot and build our own DIY farmhouse table.

DIY Farmhouse Table
DIY Farmhouse TableThe entire process was super simple and extremely economical.  For a step-by-step guide and all the details on how to DIY your own farmhouse table, meet me over at The Home Depot blog.

Forever Home Update No. 5

Forever Home

Forever Home

It’s been a little while since my last forever home update, but not much has been accomplished. Oh, much has been accomplished, but not much that you can actually see.  We are steadily headed toward the finish-line of move in day and I could not be more excited!

Forever Home

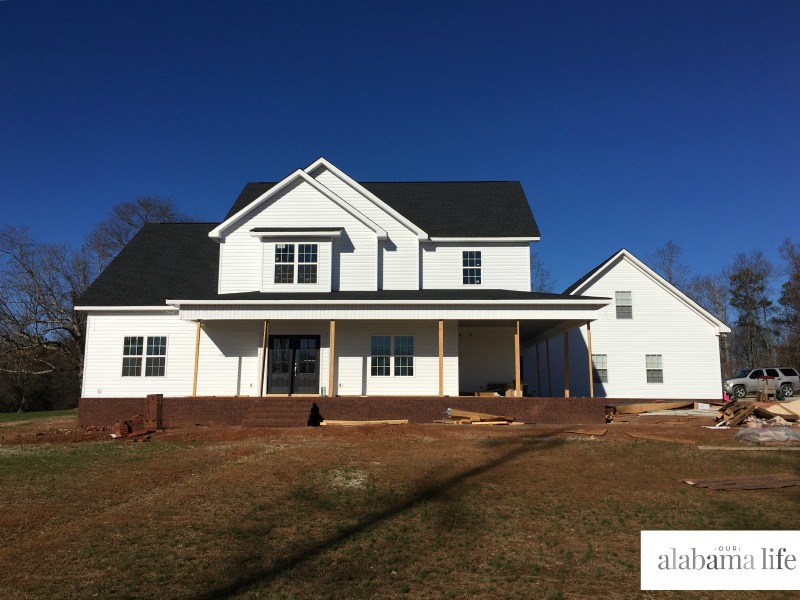
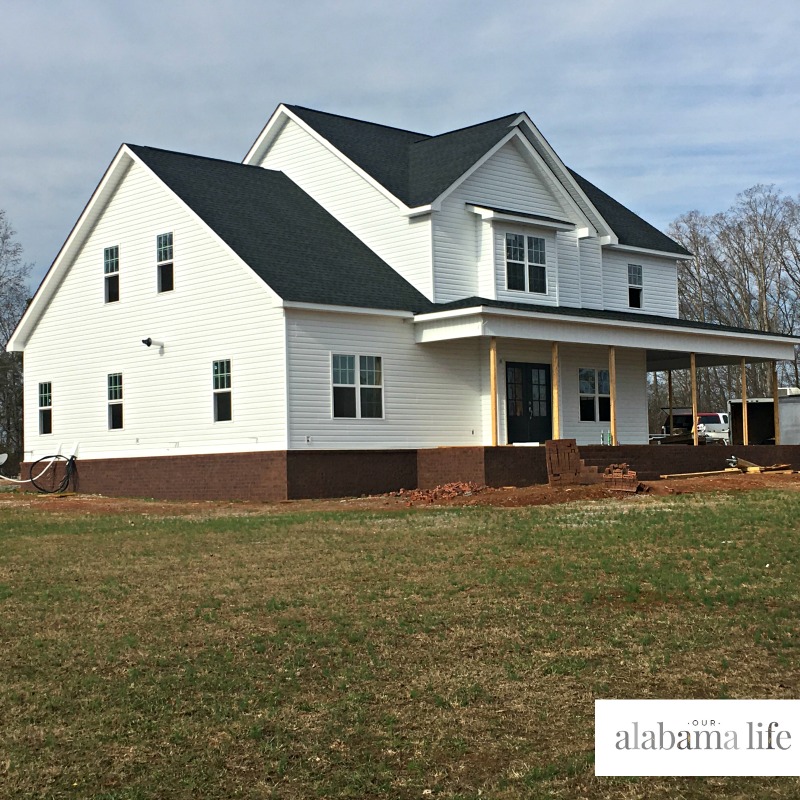
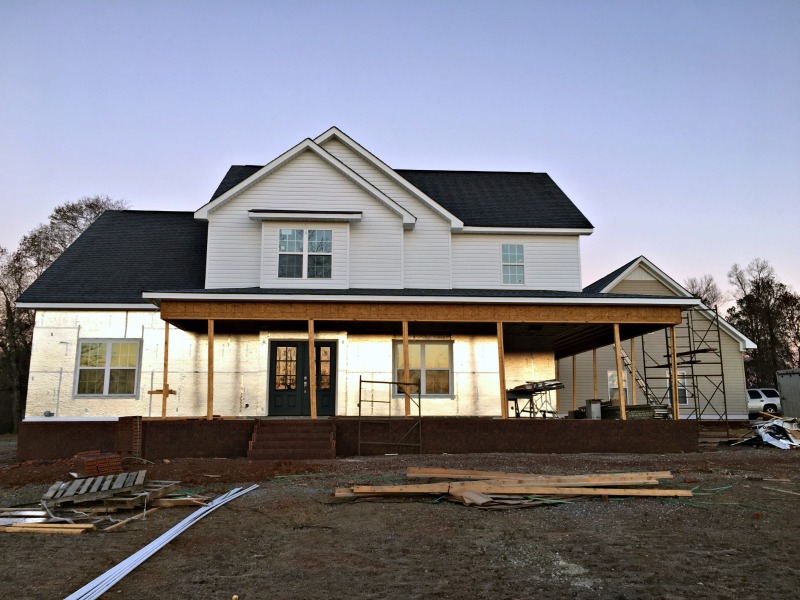
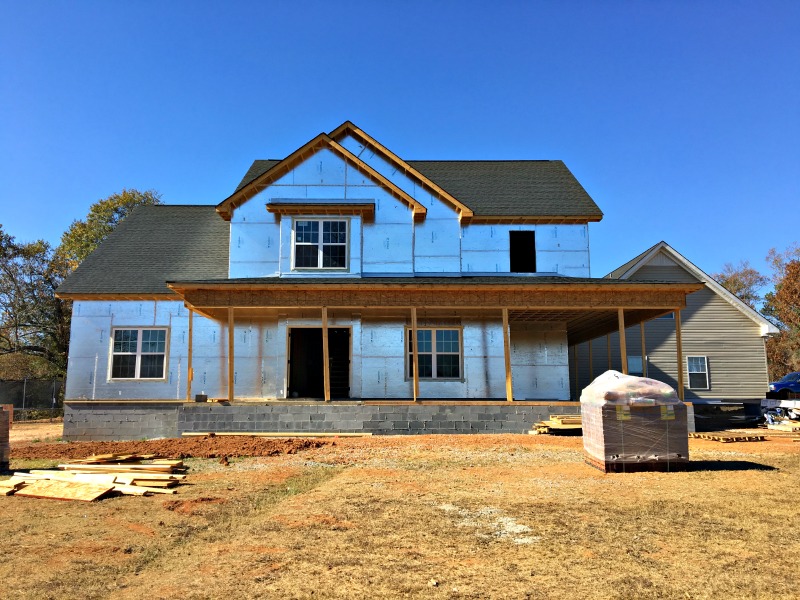
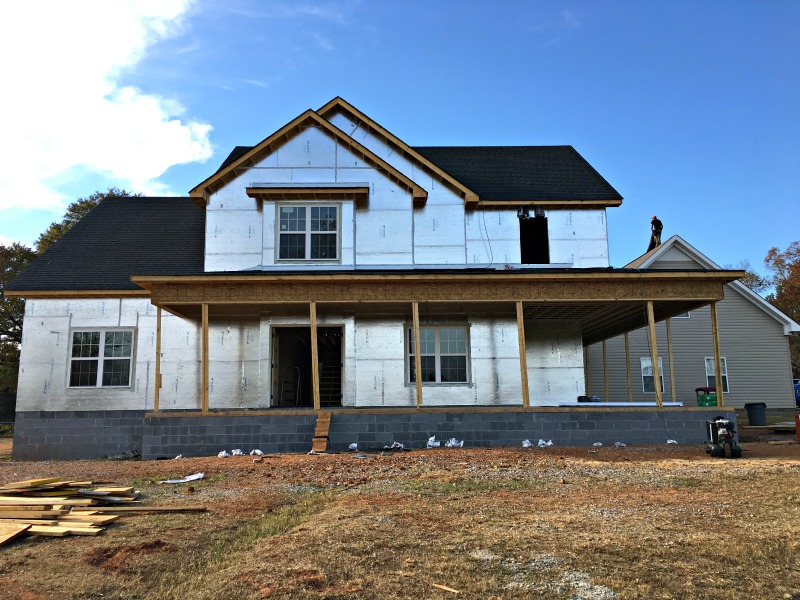
The house exterior is almost complete.  We need to relocate all those extra bricks and dispose of some vinyl scraps.  The columns and shutters both need to be installed.  The HVAC units will go where all those thick wires are sticking out at the left of the above photo.

The right side of the house (that you can’t see) is still unfinished.  That is the side our garage doors will go on, but since we are still living in the garage, we aren’t quite ready to put those in yet.  The vinyl on that side and the garage doors will all be installed in a few weeks, a little closer to move-in day.

Forever Home

Forever Home

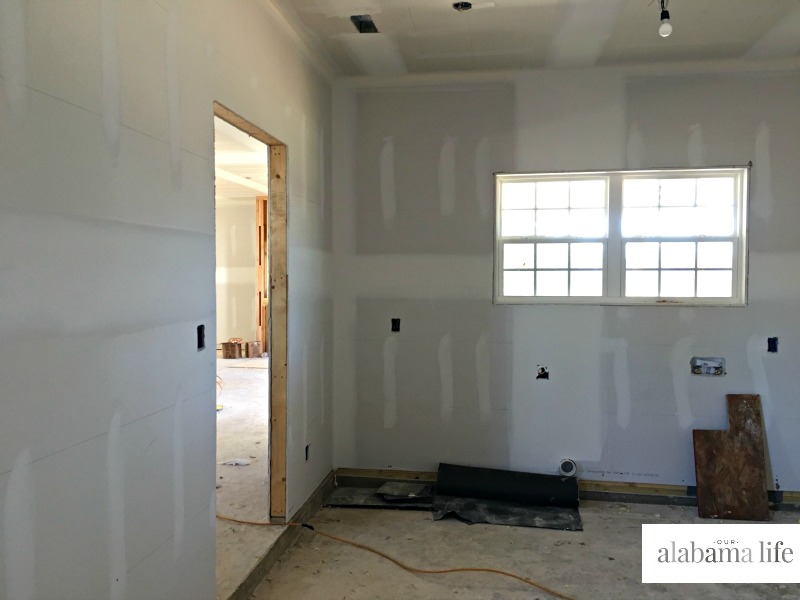
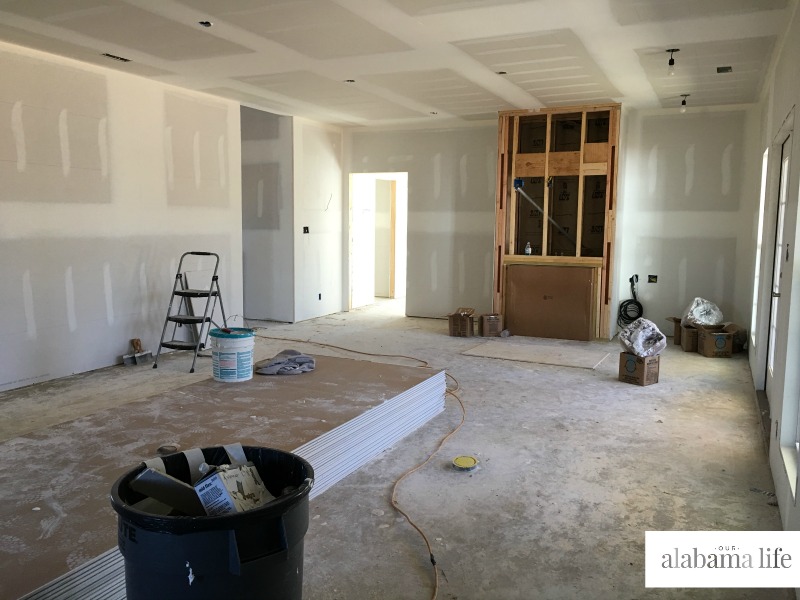
Sheetrock is so close to being finished.  The cold temperatures have slowed down the drying process, so our guys are having to wait an extra day between mud coats.  We hope to have the sheetrock completed next week.

As soon as the sheetrock guys are finished, we will go in and give everything a good cleaning.  Windows will need to be scraped and cleaned, walls will be wiped down and the floor will be swept, vacuumed, and possibly even mopped.  That sheetrock dust makes a HUGE mess!

The next step will be PAINTING! I have a general idea of what colors I want to use, but you know as well as I do that there are 16.4 million different shades of gray and white out there.  Do any of you have a favorite gray paint color?  Or white?

Our running to-do list:

  • Clear land. completed August 25, 2016
  • Pour footer. completed August 30, 2016
  • First plumbing and electrical rough-in. completed September 7, 2016
  • Pour slab. completed September 10, 2016
  • Framing. started October 3 and completed October 20, 2016
  • Roofing. completed October 30, 2016
  • Second plumbing rough-in. completed November 11, 2016
  • HVAC rough-in. completed November 17, 2016
  • Brick skirt and steps. completed November 18, 2016
  • Vinyl siding. near completion.
  • Electrical. completed December 5, 2016
  • Hang insulation. completed December 15, 2016
  • Shutters.
  • Install and finish sheetrock. in progress
  • Tile shower.
  • Paint.
  • Install lights.
  • Floors.
  • Cabinets.
  • Clean.
  • Move in.
  • Host all-the-things. =)

Forever Home Friday Update No. 4

If you are new here, welcome! Let me give you a quick recap.  In August of 2016, we began building our forever home.  We are our own contractors and are doing a large portion of the work ourselves.  (And when I say ourselves, I really mean my wonderful husband and terrific dad.)  You can find the beginning of our building story here or just jump right to the last update here.

Justin has been telling me to expect a move-in date sometime around the end of March, but last week he slipped up and told someone it may be the end of February, so I am holding him to that date!  Since my last update, they have finished our electrical–wave all the praise hands!  I plan to do a post with all the little things we thought to add, but for now just know that we have outlets everywhere.  {In every single nook and cranny and along every four feet of wall space.  Because heaven forbid we need to plug something in and not be able to. <–This is a little joke between Justin and I.  He’s a big fan of outlets, I don’t want them messing up my pretty walls.}

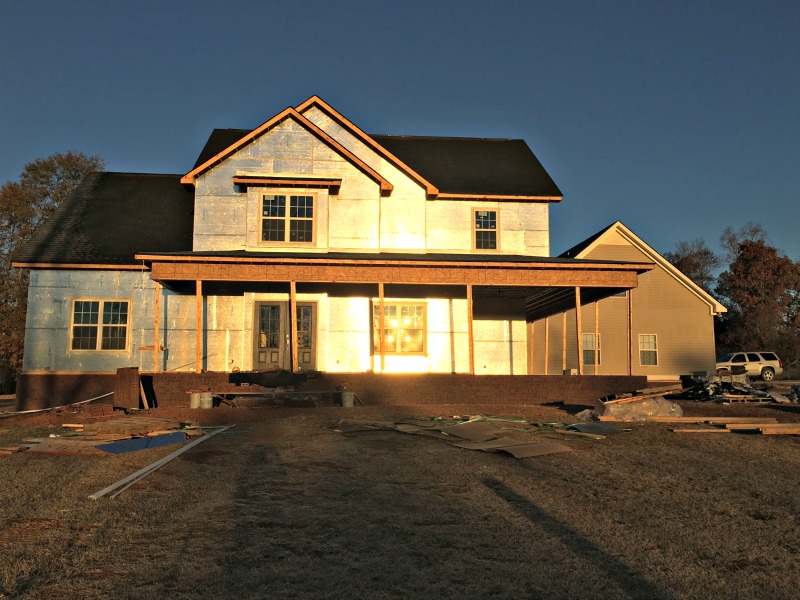
Our outside vinyl is well on it’s way to being complete.  Please forgive the sub-par photo above.  This time-change/getting dark so early is killing my house photography.

Our insulation is about half-way finished.  (I took a photo of it stapled into the wall, but I think I’ll save you that.  If you are as excited as me about all these little details, just let me know in the comments and I’ll be glad to include the insulation photo. {wink})

The plan is for our sheetrock guys to begin work sometime next week.  I’m not sure how much work they’ll get done as we are nearing the holiday, but I’m hoping it’s a lot!  As soon as the sheetrock is finished, we’ll begin painting.  Next up will be installing flooring and cabinets, giving everything a good cleaning, and MOVING IN!!!  I think all that can be accomplished by the end of February, don’t you?

Our running to-do list:

  • Clear land. completed August 25, 2016
  • Pour footer. completed August 30, 2016
  • First plumbing and electrical rough-in. completed September 7, 2016
  • Pour slab. completed September 10, 2016
  • Framing. started October 3 and completed October 20, 2016
  • Roofing. completed October 30, 2016
  • Second plumbing rough-in. completed November 11, 2016
  • HVAC rough-in. completed November 17, 2016
  • Brick skirt and steps. completed November 18, 2016
  • Vinyl siding. in progress
  • Electrical. completed December 5, 2016
  • Hang insulation. in progress
  • Shutters.
  • Install and finish sheetrock.
  • Tile shower.
  • Paint.
  • Install lights.
  • Floors.
  • Cabinets.
  • Clean.
  • Move in.
  • Host all-the-things. =)

PS: We have done a large part of this construction ourselves, but we have used some amazing contractors as well.  If you are local and are planning any type of construction project, please feel free to contact me so that I can pass on my list of names!

Forever Home Friday Update, No. 3

forever-home-friday-update-no-3-bHow about a Friday update on a Monday?  (Because honestly, that’s just the way my life is going lately!)

We are moving right along with our forever home and I am more anxious than ever to be finished.  I think the closer it gets to being complete, the more ready I am to be in and settled and HOSTING ALL THE HOLIDAY THINGS!  I can’t wait to have the family over for Thanksgiving dinner (next year) and Christmas festivities (next year) and Easter egg hunts.  Fingers crossed, this Easter will be our first holiday in our new home.

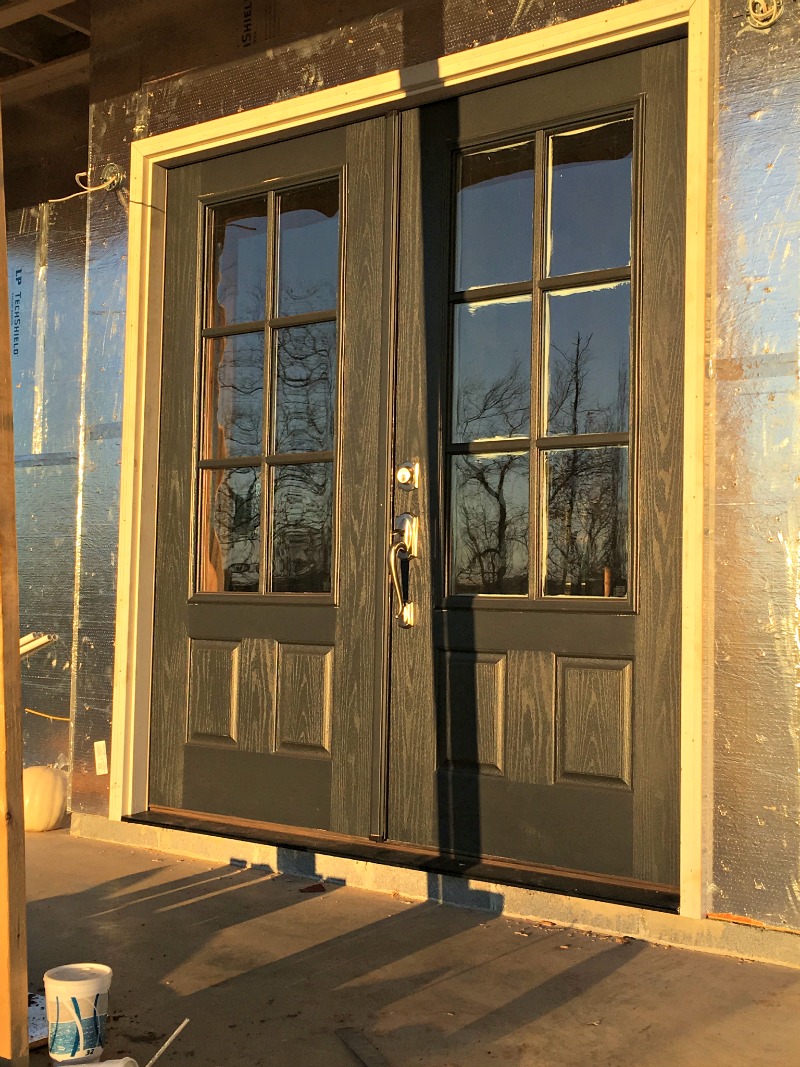
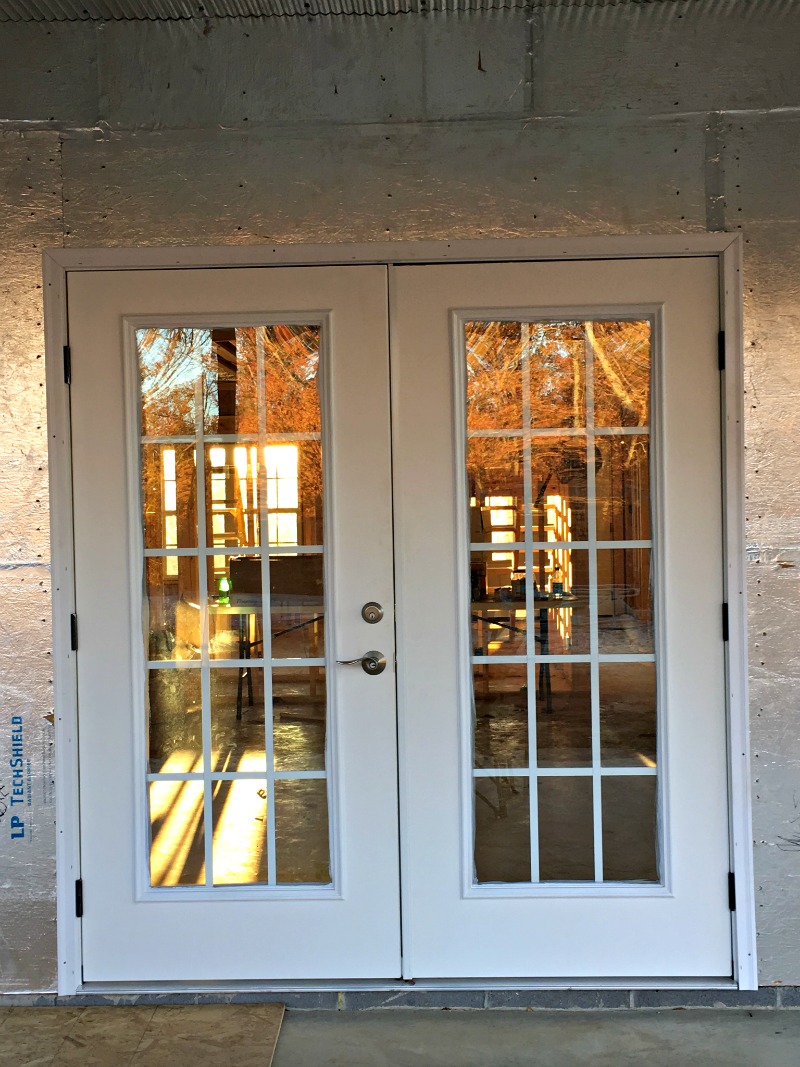
forever-home-friday-update-no-3-dWe are now officially “dried-in”.  All the windows and doors are in.  The handles/locks are on the front and side doors.

forever-home-friday-update-no-3

The back doors are finally painted, installed, and ready to go.

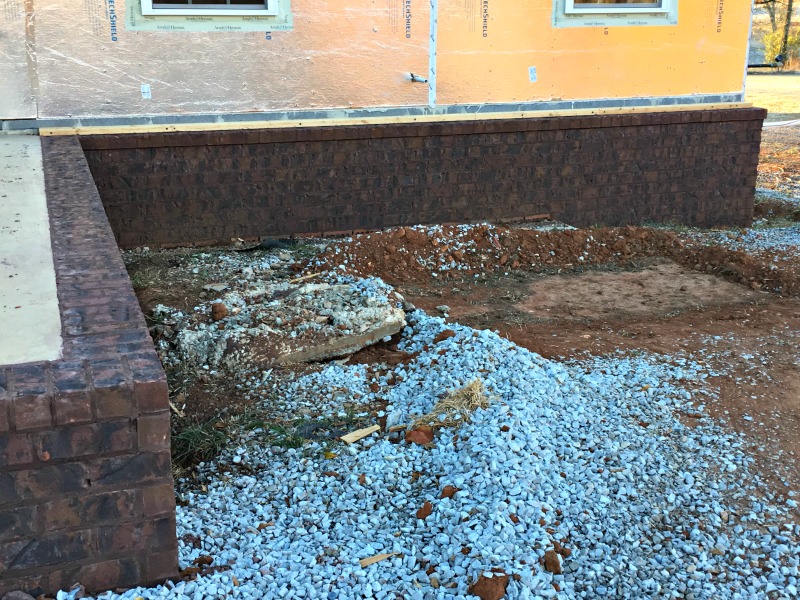
forever-home-friday-update-no-3-aThe brick skirt around the house is finished.  As I am typing this post, they are working on our stairs.  By tomorrow, we should be able to walk up the stairs onto our front porch and go in the front door just like  a real house! EEEEEK! (Yes, it’s the little things that make me excited!)

The plumbing rough-in is complete.  The HVAC rough-in is complete.  The boxes are in place for the outlets and the switches and the lights, but Justin and my dad still have to run the wires for the electrical.

We have vinyl guys scheduled to start next week, and that process should take about 3 weeks to complete.  When the vinyl is complete, we will hang shutters and the entire exterior will be finished—–yay!!

Running to-do list:

  • Clear land. completed August 25, 2016
  • Pour footer. completed August 30, 2016
  • First plumbing and electrical rough-in. completed September 7, 2016
  • Pour slab. completed September 10, 2016
  • Framing. started October 3 and completed October 20, 2016
  • Roofing. completed October 30, 2016
  • Second plumbing rough-in. completed November 11, 2016
  • HVAC rough-in. completed November 17, 2016
  • Brick skirt and steps. completed November 18, 2016
  • Vinyl siding.
  • Electrical.
  • Hang insulation.
  • Install and finish sheetrock.
  • Paint.
  • Install lights.
  • Floors.
  • Cabinets.
  • Clean.
  • Move in.
  • Host all-the-things. =)

Forever Home Friday Update, No. 2

Forever Home Friday Update No 2I decided last week that a “Forever Home Friday Update” was the best way to keep you up to date on the little happenings at the house.  You know, until I have more big news to share, like brick or vinyl siding or CABINETS!

Before the weekly update, let me give you a little recap:

  1. Our footer was poured and finished.
  2. The framing was completed:  first downstairs and then upstairs.
  3. Front and side doors, windows, and shingles were installed.

Studs, walls, and floor boards have been saturated with God’s Word.  My mom and sister invited our family and several friends over to “bless” our house, and we most definitely received a blessing.  For all that goodness, check out my instagram posts.

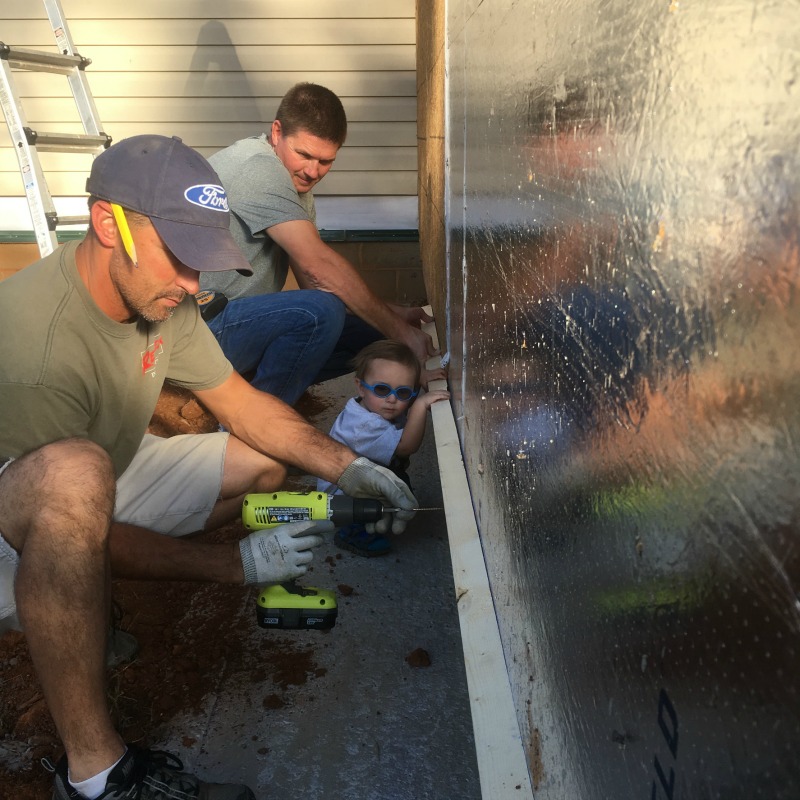
The exterior still looks very similar to last week, with the exception of that 2×2 board that wraps around the lower part of the house.  This board will separate the brick from the vinyl.  (There is a more technical explanation of this, but I don’t know it!)

“Worker man” Jase was in on all that action, of course.forever-home-friday-update-no-2-c

forever-home-friday-update-no-2-d

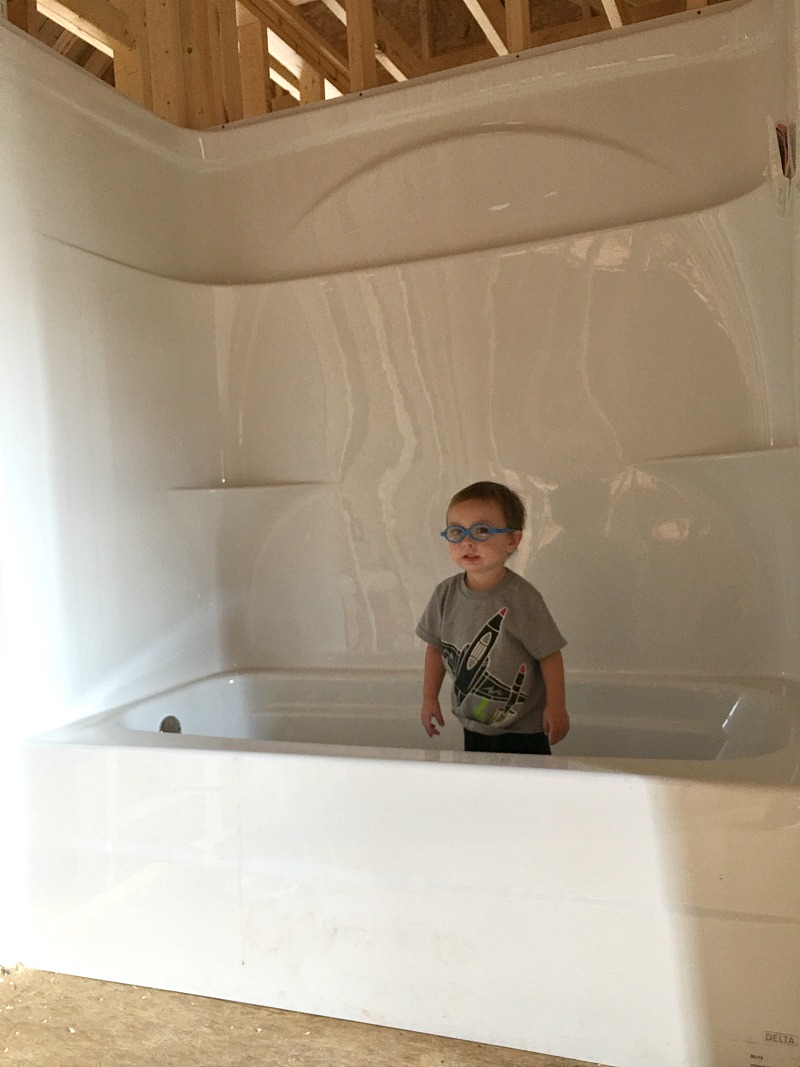
The plumber came and installed most of the rough-ins, which include our bathtubs.  {Jase was SO excited about his tub shower!! He just had to crawl in and play around for a while!} The plumber has also installed all the pipes that will go in the walls.  We are waiting on a few more faucets to come in and the plumbing rough-in will be complete.

forever-home-friday-update-no-2a

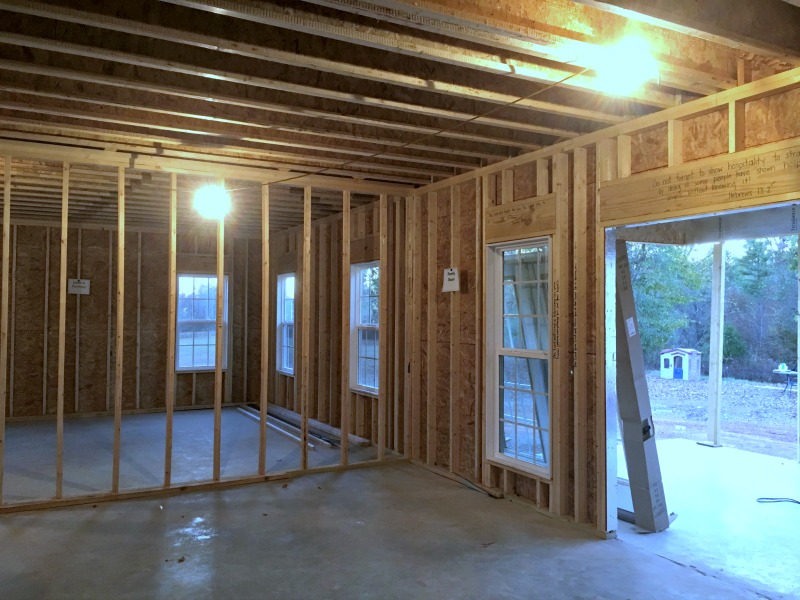
We don’t have anything wired just yet, but Justin strung work-lights throughout the downstairs.  I was so strangely excited about this.  Justin called me a weirdo, but it just makes the house feel even more real or something!

forever-home-friday-update-no-2-b

A lot of what was planned to happen this week got pushed back to next week, so I’m hoping to have lots more to share on the next update.  The brick mason will start (hopefully) on the brick and fingers-crossed, we will get all the doors and windows ready so that we can lock up.  {Honestly, I’m anxious to get those doors finished so we can close them up and keep the dogs out. They think the house is their very own personal place right now!}

The gas company is scheduled to come out and run our gas lines and the HVAC guy is scheduled to do his thing.  Justin and my dad are beginning the wiring process this weekend.  We are still trying to decide whether we should install the vinyl siding ourselves or pay someone to do that.  Money versus our time and all that.

And since I’ve included several photos of Jase, I’ll leave you with this one of my girls.  They are growing up so dang fast and it just makes my heart hurt sometimes.

picmonkey-image

PS:  We have been loving some SnapChat filters lately…. they are so stinking fun!

PPS:  To see all our building posts, you can click on the “Categories” menu to the right.  Select “Building” and you’ll see everything I’ve shared so far.  If you want to make sure you don’t miss anything, find the “Subscribe” option in the right sidebar.  Enter your email address and all my posts will be delivered right to you!

Forever Home Friday Update

Forever HomeWe have been moving along quite well with our forever home.  I thought sharing a short update would be a great way to keep you informed of all the little things that have been happening–the things that don’t quite deserve a full blog post.

In my last home post, I told you that all our framing was completed (with the exception of the doors and that one sad window at the top we had to re-order!).

Since then, a few things have happened. We have a real roof, with actual shingles. Because the shingles on the current part of the house are 10 years old, we decided to put new shingles on that part too so that everything would match.  (Sidenote:  When the roofers installed the new shingles on the current part of our home, they had to take our satellite down.  I don’t watch much tv, but I do record three shows {This is Us, Blacklist, and Blindspot} and watch them after the kids go to bed.  I have missed two of the three this week and am so sad!)

Our front and side doors are installed and have two coats of paint on them. Hopefully, we will install our back French doors, finish the painting process, and install knobs this weekend so that we can get the place locked up.

As I am writing this post, the plumber is roughing everything in and the brick are being delivered.  The brick mason and our HVAC guy are coming next week, and my favorite workers (i.e. Justin and my dad!) will start installing the siding.

I know everyone says this, but I feel like the framing process went sooooo very fast and now everything has slowed down.  It’s even slower since we are doing so much of the work ourselves.  I had to remind myself this week that I really am loving this process and I don’t want to rush it–not too much anyways!

Building A House | Framing, Part 2

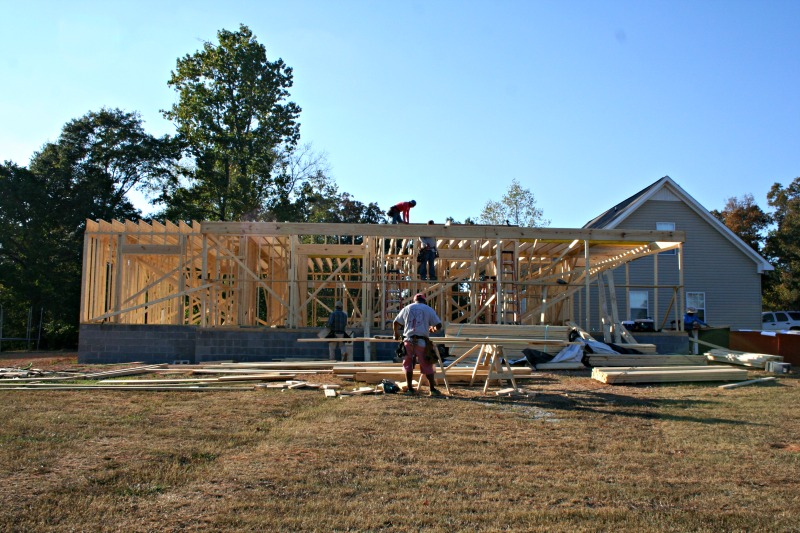
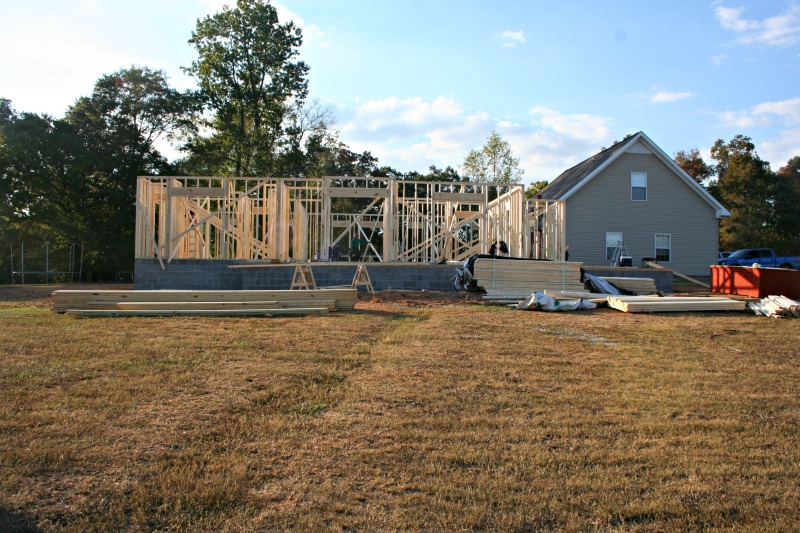
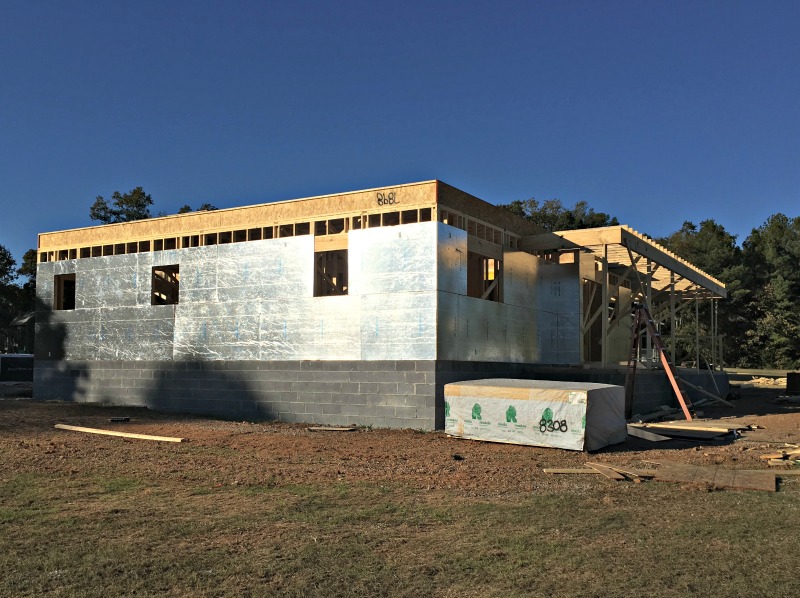
You guys, building our forever home is so surreal.  I have dreamed about this for years, and to see it coming to life is nothing short of mind-blowing.  When I last left you, the entire downstairs of our home had been framed up.  Parts were covered by tech-shield; bracing boards were scattered throughout.  It looked a bit like this:
building-a-house-framing-part-2-e

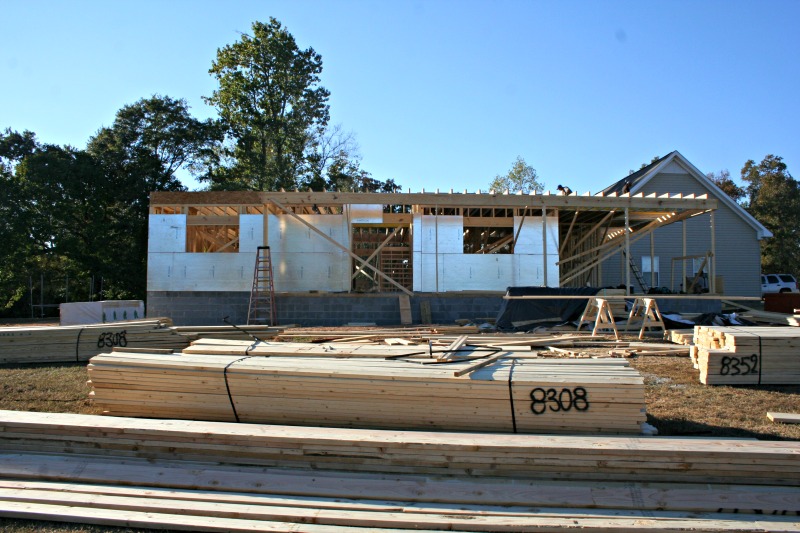
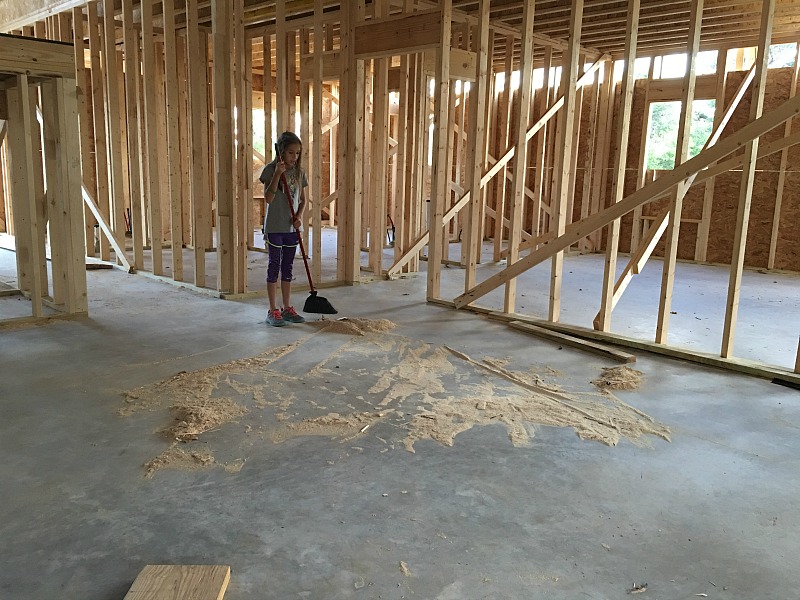
As soon as all that silver board (LP Tech Shield) was installed, most of the bracing beams inside the house came down.  There are still a few, but it’s not quite the maze/crossfit workout that it was before.
building-a-house-framing-part-2-d

Most days, the kids and I go out and pick up trash.  My framer and his crew rock and they mostly pick up after themselves (—what?!?! It’s unheard of, I know.), but there are usually a few stray nails left out and some sawdust to be swept.

When the first floor was framed, the only way to go from there was up.

building-a-house-framing-part-2-a

The rooms were framed up first, then the exterior walls.  These guys get so much done during the day that it’s hard for me to keep up with in-process shots. (Definitely not a bad problem to have!) After all the walls and most of the tech-shield was installed on the second floor, the framers started with the roof boards.

The photo above shows how the original, plan-drawn roof-line was supposed to look.  Our framer wasn’t super happy with the way it turned out in real-life, so he framed up something a little different and texted us a photo.  (Just one of the many reasons I love him and constantly sing his praises–he knows his stuff and he has vision.)

building-a-house-framing-part-2-c

We loved the change he made, so we opted to keep it.  I think it adds so much to the overall appearance of our house and it is something I never would have thought to change.  Or known how to change, even if I had thought about it!

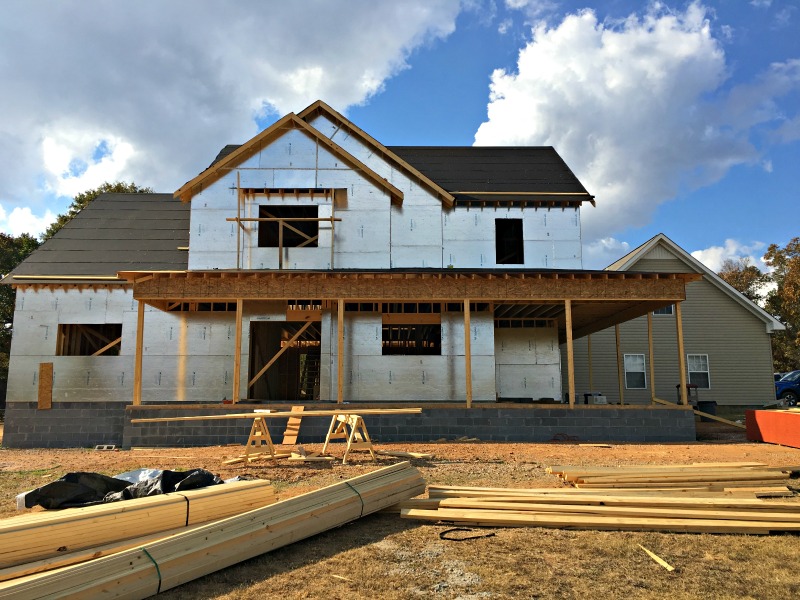
When all the walls were framed and most of the tech-shield was on, some of the crew started laying tar paper on the roof.  This helps protect the wood in case of rain and serves as a base for the shingles.  For some reason, the tar paper makes everything look so much more finished to me.  Maybe because it gives the impression of shingles?!?
building-a-house-framing-part-2-b

As of today, the framing is 98% complete.  This week, the framers will be finishing the carnish for the vinyl, installing windows and doors, and will begin installing the shingles.  (That will be a j-o-b, because they will lay shingles on the old part of house too.)

We still have a long road ahead of us before completion, but we’ve got a good jump on things.  It helps that our framers have been able to work ALL DAY EVERY DAY because of the extreme drought situation we are experiencing here in Alabama.  I know we need rain, and desperately.  But if it could hold off (and it looks like it will!) until the end of next week, I’ll join the rest of you in doing the rain dance!
Building A House | Framing, First Floor

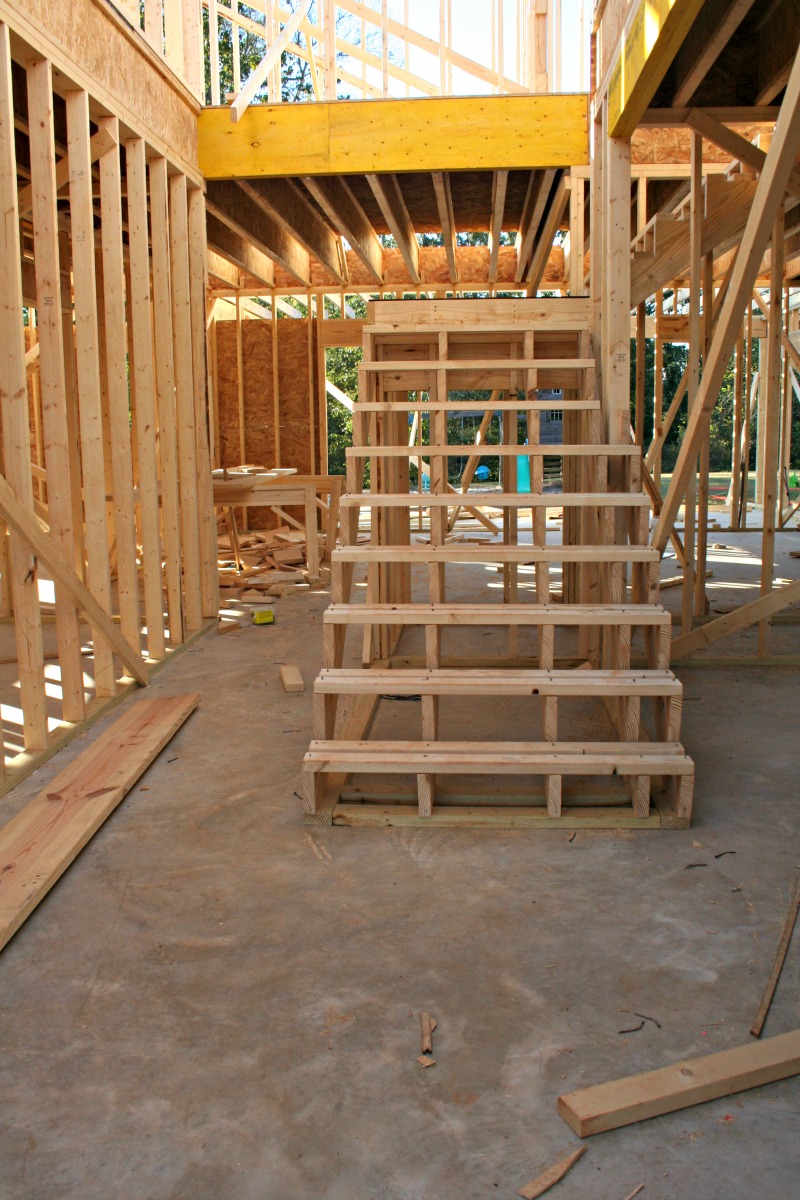
building-a-house-framing-6Confession:  I have taken no fewer than 16 million photos of our house building process, and we are still only beginning.  Building a house is SO MUCH FUN and the process of framing has my excitement level through the roof.  We have walls–we have rooms.  We have stairs, for goodness sake.  I can thoroughly visualize where everything will be and it is pure awesomeness.
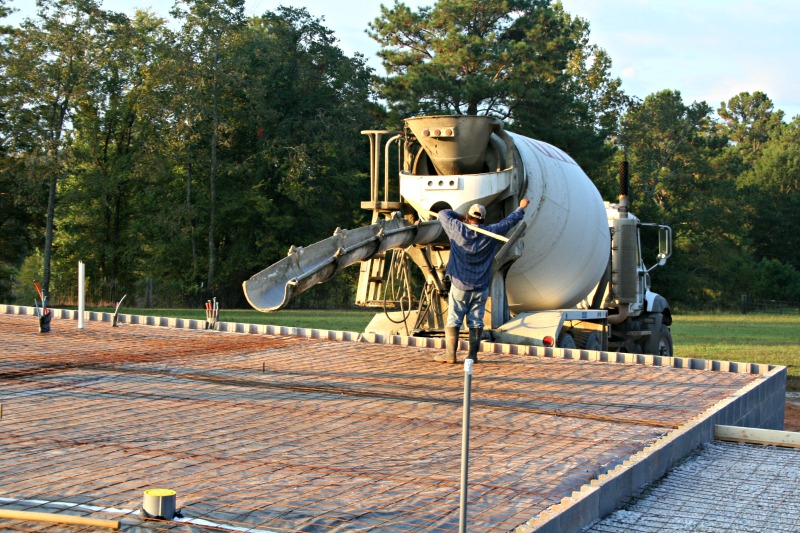
On my last house building post, I shared with you all about building our foundation.  Once the foundation was complete, we played the waiting game for about three weeks.  {Believe me when I tell you that our framer was worth the wait.  We adore him and if you are building anywhere in our area please let me know so that I can give you his contact information!}

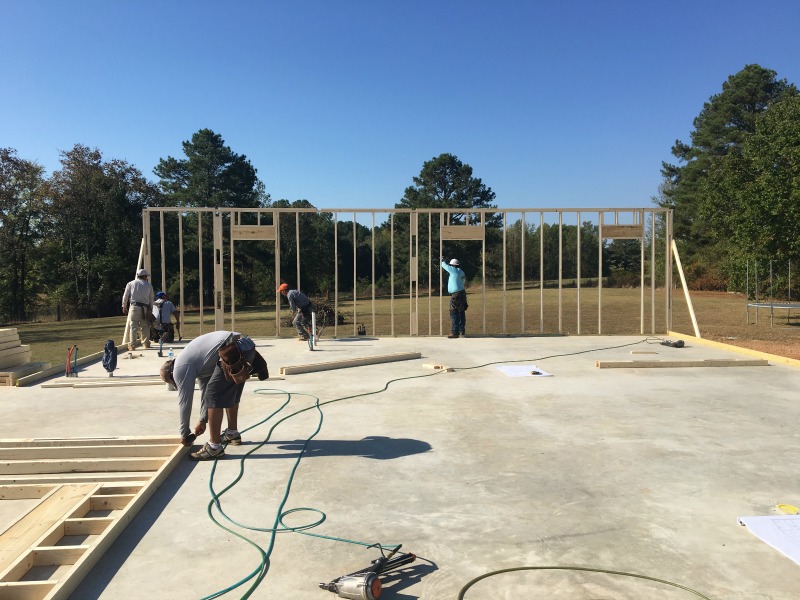
building-a-house-framingThey started with the exterior walls on the first floor.  The wall above is our master bedrooom/ bathroom area.  Lots of bracing has to happen to keep these walls level/square with the rest of the house.  Right now, we can’t even walk through rooms without having to duck around sixteen different bracing boards. It’s like a maze/crossfit workout all rolled into one!

building-a-house-framing
Photo credits: Kyndall

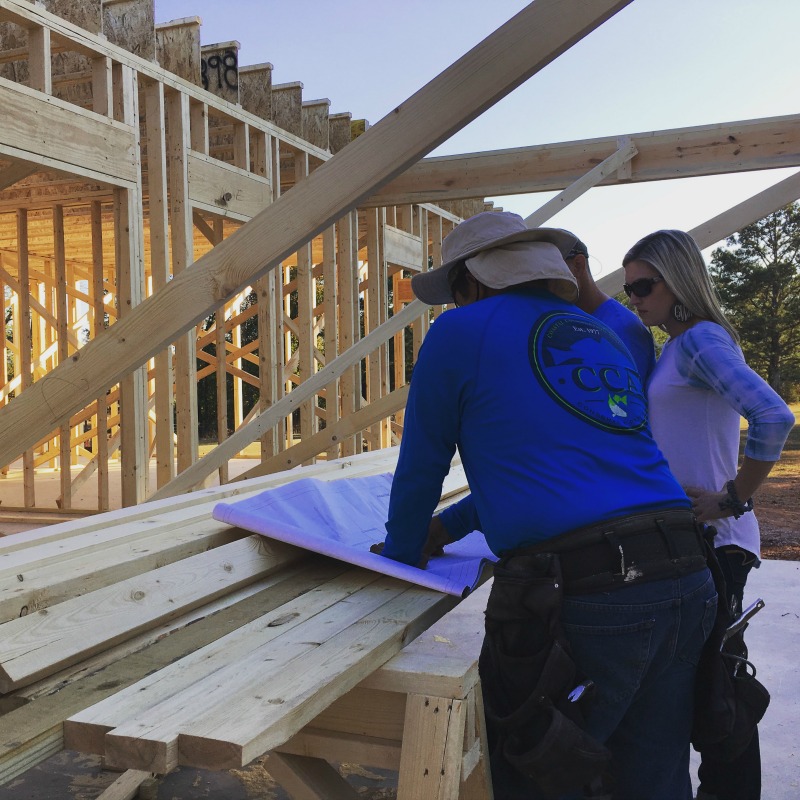
It turns out that our plans weren’t the best.  There are lots of missing measurements and things that don’t quite add up.  Every afternoon, we’ve met with the framer and worked out kinks.  This error in measurement has worked in our favor every time except for one.  Our foyer area is much narrower than I wanted it to be.

building-a-house-framing-7-2

It’s big enough to walk through comfortably and big enough to get furniture through, just not as open as the house plans led me to believe.  In the big scheme of things, this is SO not a big deal, I’m just all about full disclosure!

building-a-house-framing-5Once all the exterior walls were in place, they began setting the interior walls.  (Confession:  I have made them move a total of three walls after they were framed.  One to make a closet bigger; one because the plans were messed up and we couldn’t actually fit a door into our bathroom (<–insert frustrated eye-rolling emoji here); and one to open up our foyer area as much as possible.)

building-a-house-framing-7

We chose LP tech-shield boards to sheath our house.  (They are not paying me for this shout-out, but maybe they should!)  Typically, builders use thin sheets of wafer board and then wrap it with plastic-like house wrap.  Tech-shield boards have a thin sheet of aluminum on the outside layer, which is much more energy efficient.  Their website claims to block up to 97% of a home’s radiant heat.

Once the first floor was done, they moved to the second floor and stared the whole process over.  Exterior, then interior.  Sheathing.  They are currently working on the roof and as soon as that is finished, the doors and windows go in.  I can’t wait to see (and share with you!) when all that is complete!

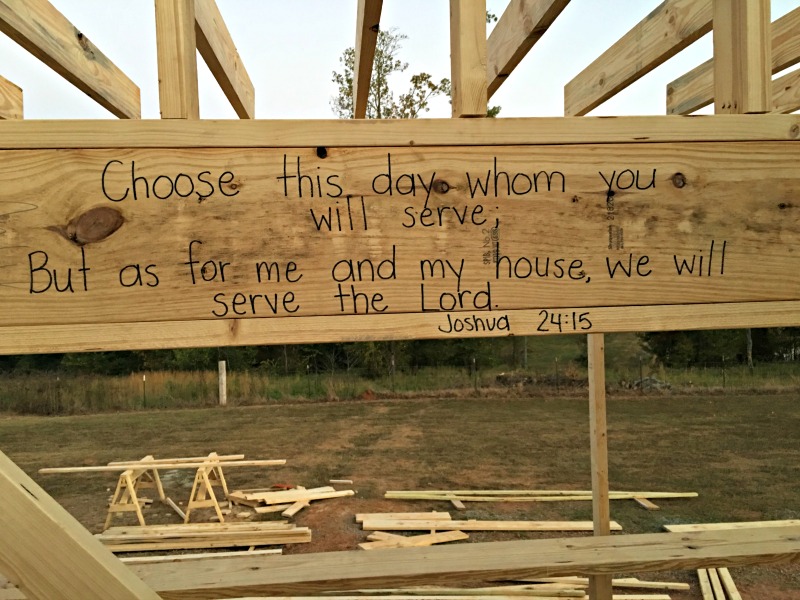
building-a-house-framingWith the first floor framed, I have been working on writing scripture on the studs and doorframes.  So far I have promised that we will serve the Lord (Joshua 24:15), that we will be hospitable to strangers (Hebrews 3:4), and my favorite verse–Isaiah 1:17.  I have plans for a Scripture/Blessing party as soon as the whole house is framed up/dried in.  I love the idea of every building block of our home being flooded with scripture by our friends and family.

Building A House | Foundation Work

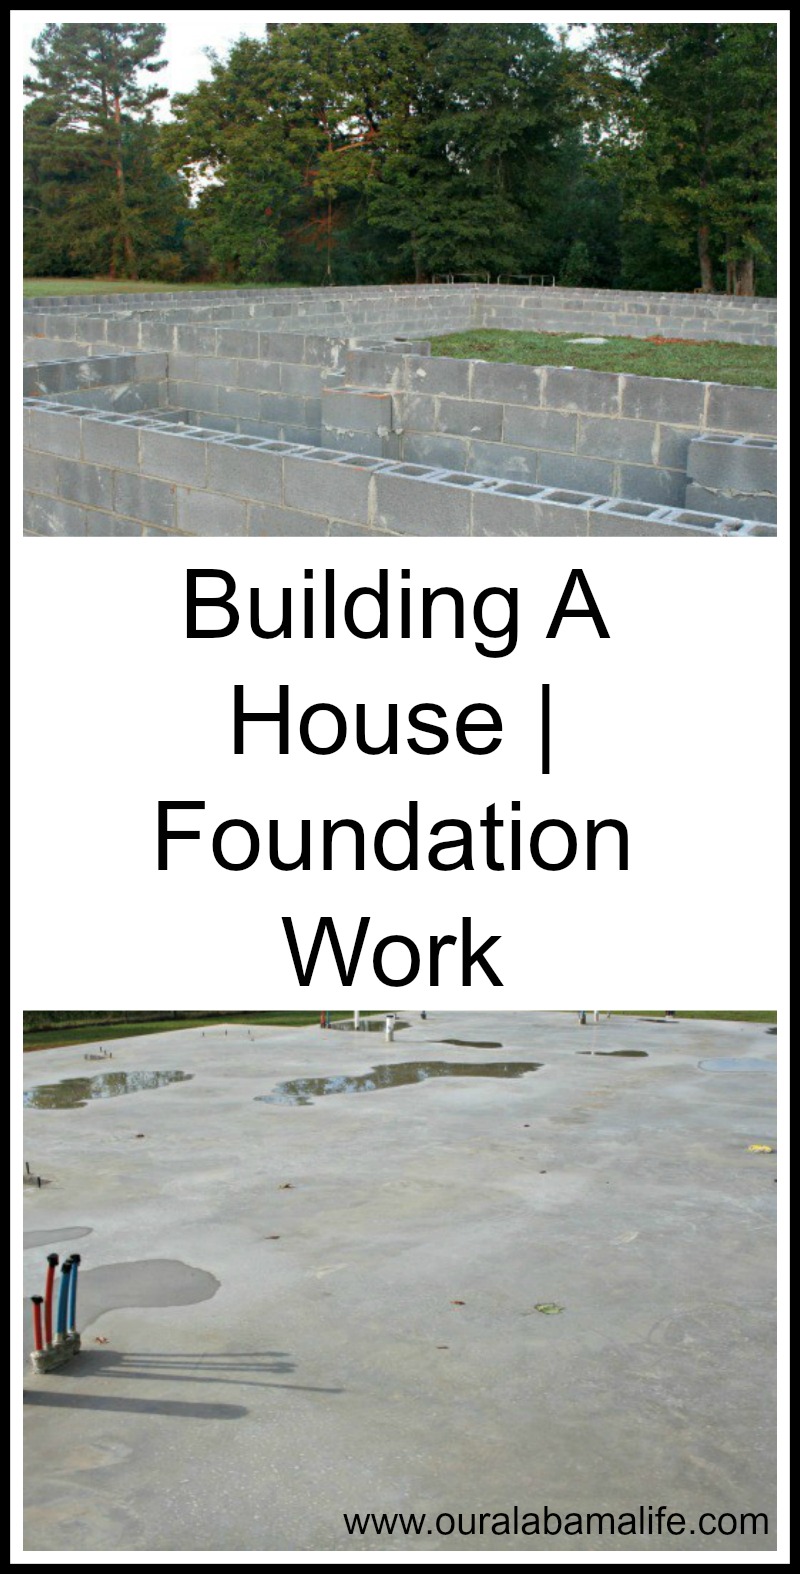
I have a confession.  Building a house has taken over every little part of my brain.  There is no available space to think about anything else.  I have become a crazy person.  (If you know me in real life, I don’t need your comments regarding my craziness.  Thank you very much.)

We now have a foundation…. yay!  Since we were adding on to an existing structure, we hired a surveyor to come and “lay out” our house.  He used a transit to shoot the lines, so we know our house is as close to perfect as it can be.

building-a-house_-foundation

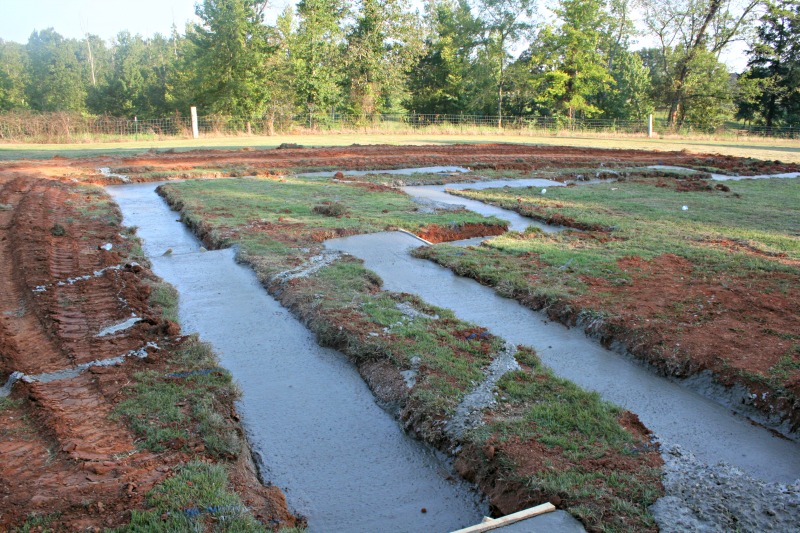
Once that was all done, our friend Brad came and began the foundation work.  They went to work with a mini-x to dig into the ground to create the footer.  The concrete trucks came out and poured the footer, which is what the block will sit on.

building-a-house_-foundation-1

building-a-house_-foundation-2

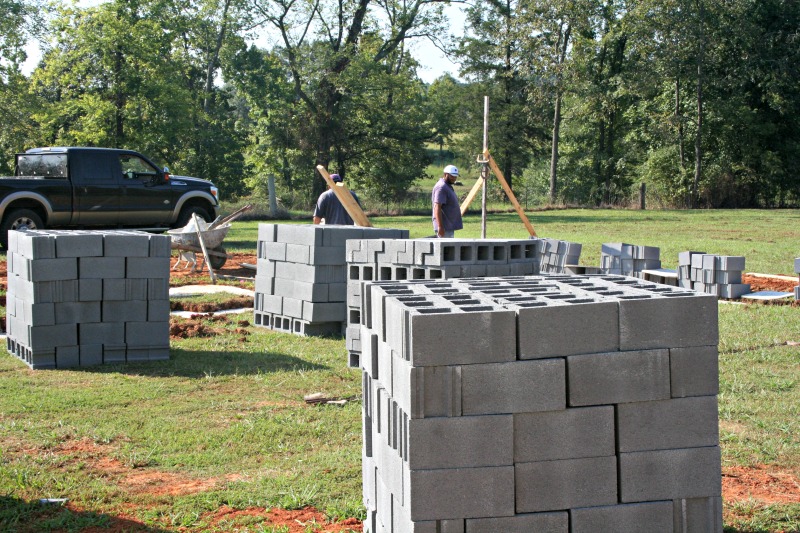
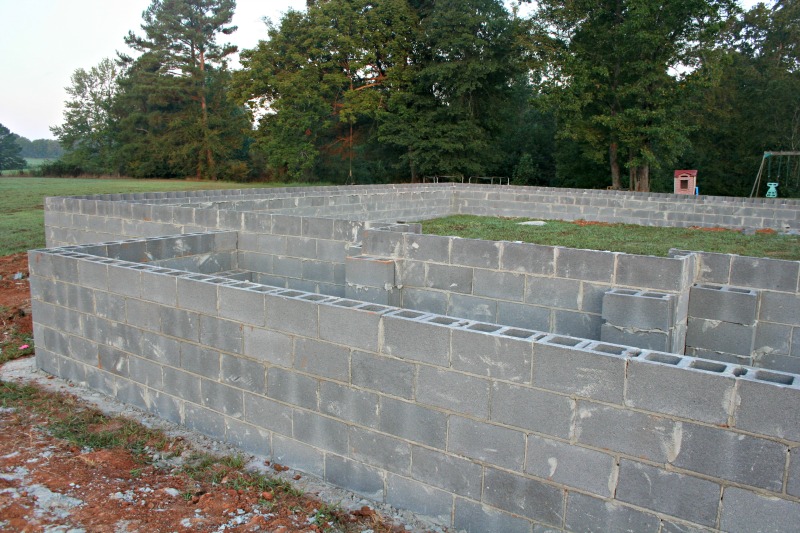
The next step was laying the block.  A crew came out and laid all the block out for the exterior walls of the house.  The top of all the block has to be level and placed just right so that the walls work out.

building-a-house_-foundation-3

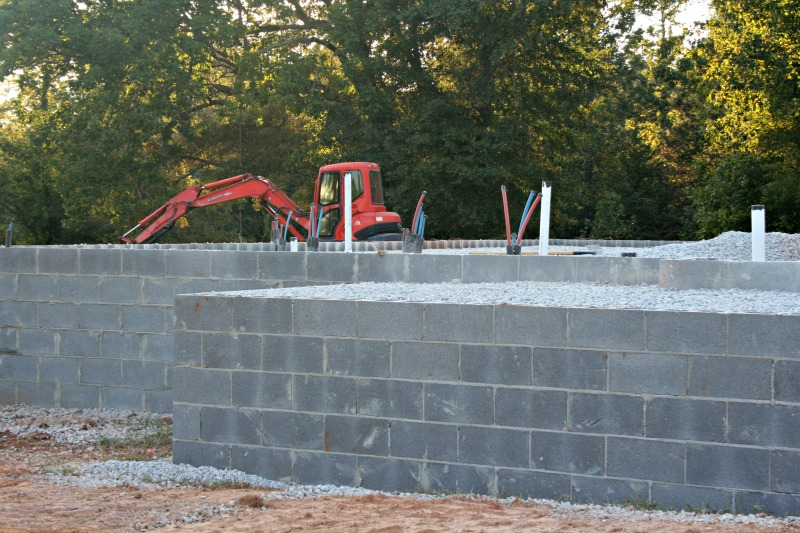
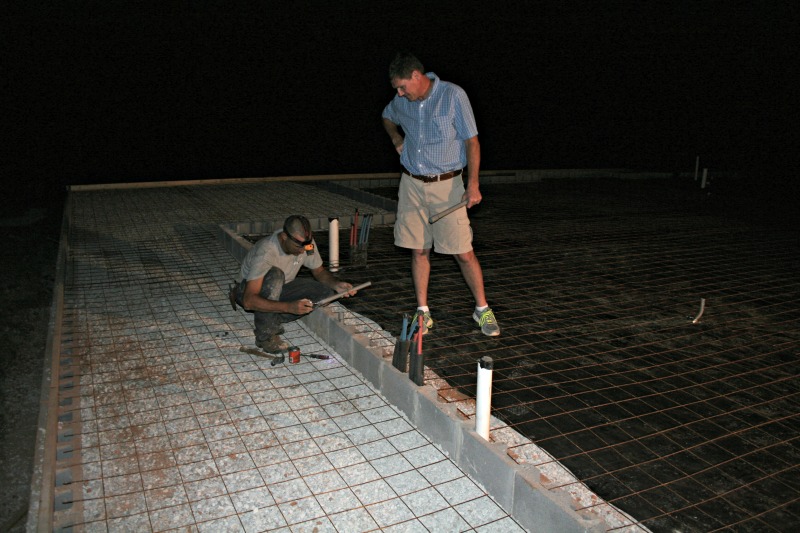
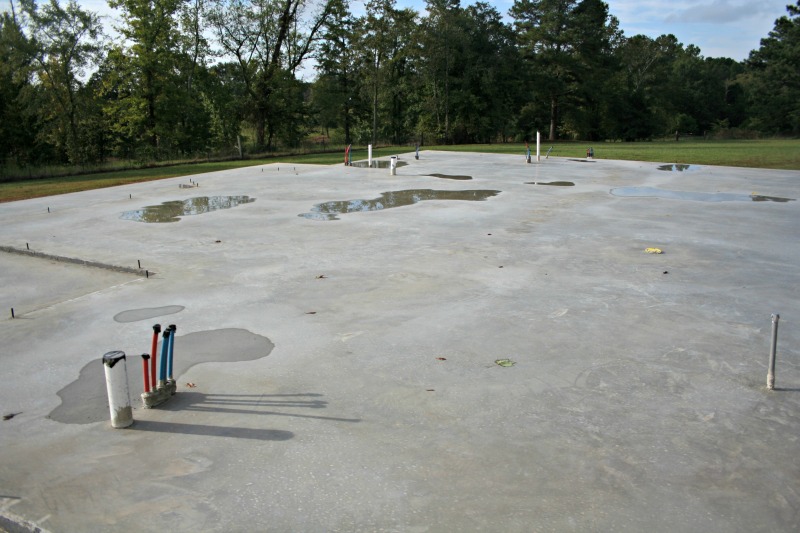
We are building our house on a slab (instead of a crawlspace), so our plumber came out during the middle of the foundation process to “stub-out” our plumbing fixtures.  This process was a little stressful to me.  Once that concrete is poured, there is no changing anything plumbing related.  Well, without a huge expense, anyways.

As soon as the plumbing was set, our block layers came back out to fill-in the rock.  The whole foundation is filled with rock and then covered with a moisture barrier to keep any water from getting to the house.  Concrete wire is placed inside the concrete to keep it from cracking.

building-a-house_-foundation-4

Justin and my dad slipped out after dark (thanks to soccer schedules) to rough-in a little electrical.  We will have a few outlets in the floor and these had to be put in before the concrete was poured.

building-a-house_-foundation-5

Last, but not least, the concrete was poured and finished.

building-a-house_-foundation-6

Our next step is framing the actual house, but our framer is a few weeks out before he can make it to us.  So for now, we wait.  {And I may or may not go sit on that concrete in my future living room and just grin like a crazy person.}

building-a-house-foundation-work-2

Forever Home Mood Board

Forever Home Mood Board

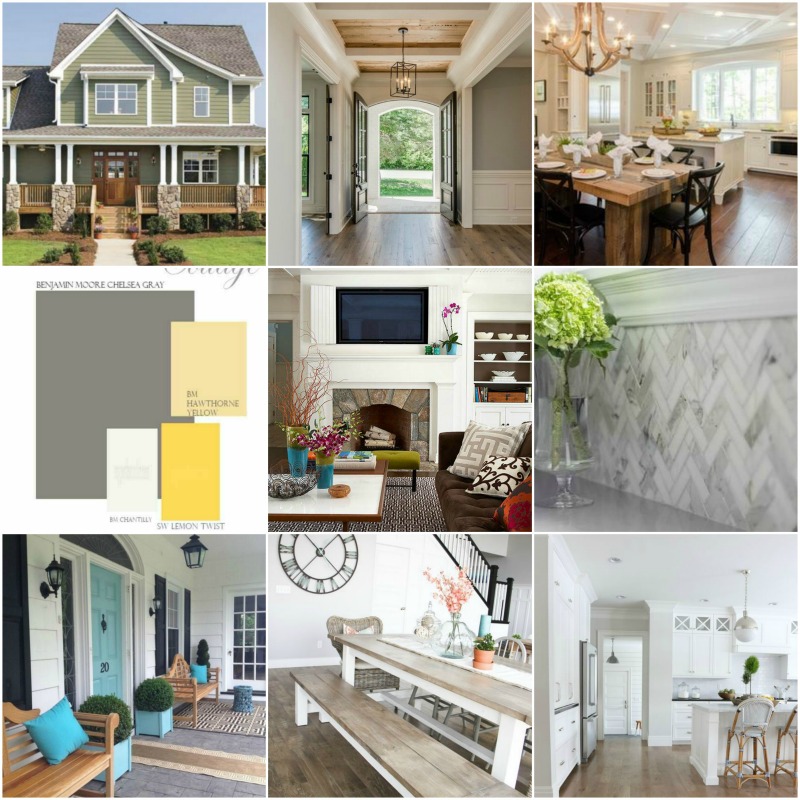
I am so thankful to Bailey for her Blog-tember prompts. I have thought about creating a Forever Home Mood Board for a while now, but it was her prompt that made me finally sit down and do it.

Forever Home Mood Board

In case you are new to the idea of a mood board, it’s purpose is to give inspiration towards a certain style or concept. I chose my favorite images from my Pinterest to create my mood board. I love how all the images flow–it certainly represents my bright and airy minimalist style.

Things I’m loving about these photos:

  • The white space.  I am a big fan of white, lately.  It makes everything look so fresh and clean and open.  I love how almost all of the photos on my mood board contain a good amount of white.
  • Wood tones.  Wood tones really warm up a space and make it feel homey.  I want my family and my guests (and myself!) to feel comfortable the minute they walk into our home and I think the wood tones really help with that.
  • Pops of color.  Turquoise and yellow make my heart happy.  I love how these photos have just enough of those colors to make the rooms bright and energetic, without being too overpowering.
  • Farmhouse vibe.

What do you think?  What is one thing you would want on your forever home mood board?