Farmhouse Kitchen and Pantry Tour with Quality Bath

Friends, we are FINALLY moved into our forever farmhouse and it has taken us a solid week to get mostly situated. Justin and I are sleeping on an air mattress because we haven’t purchased a bedroom suite yet. Originally, we had zero cell phone service and zero internet in the new house. We bought this cell phone booster and bumped our cell phone signal from zero bars to four-and-five bars.  Our garage is still packed full of stuff that needs to be sorted and put away. But for the most part, we are in!  Hallelujah!

Today, I want to share one of my favorite spaces with you–our farmhouse kitchen and pantry.
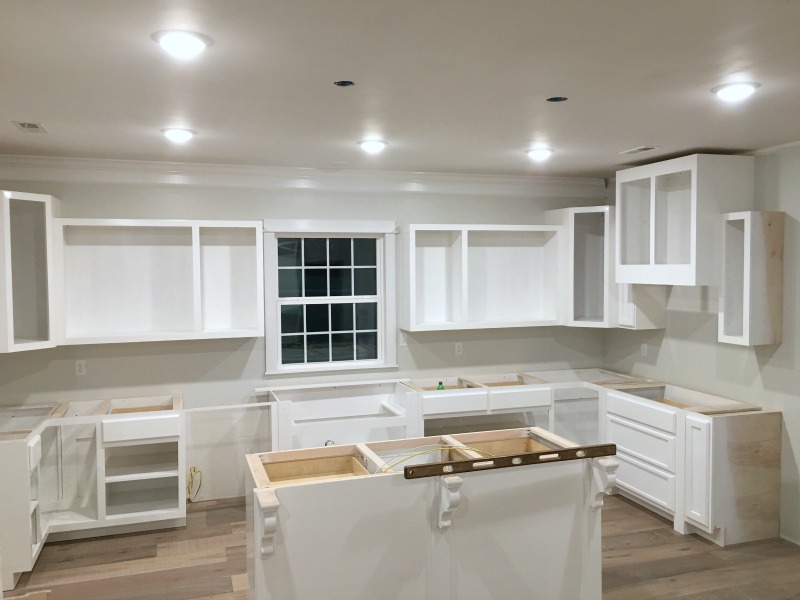
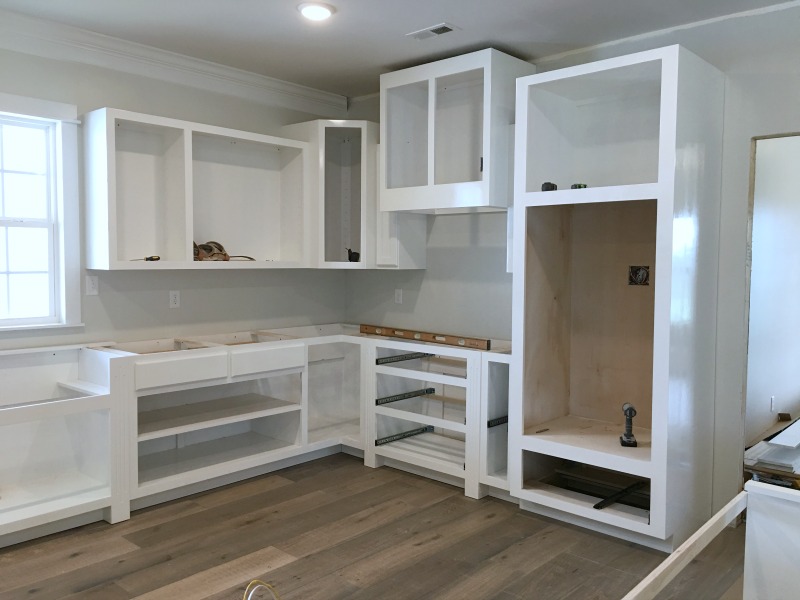
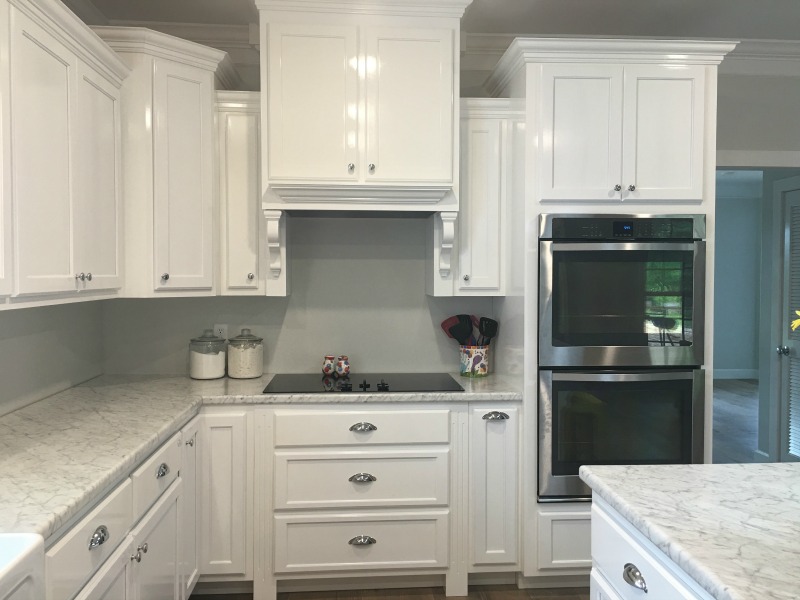
Farmhouse Kitchen:

Farmhouse Kitchen Tour

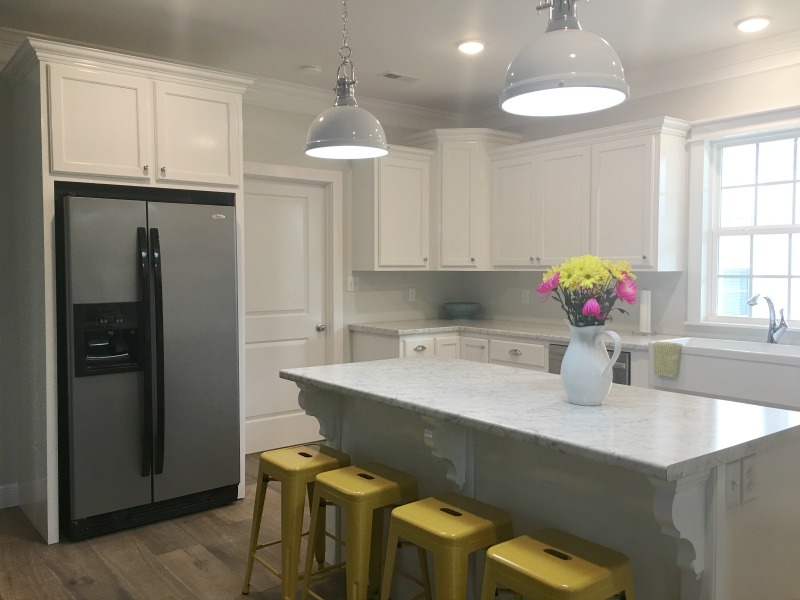
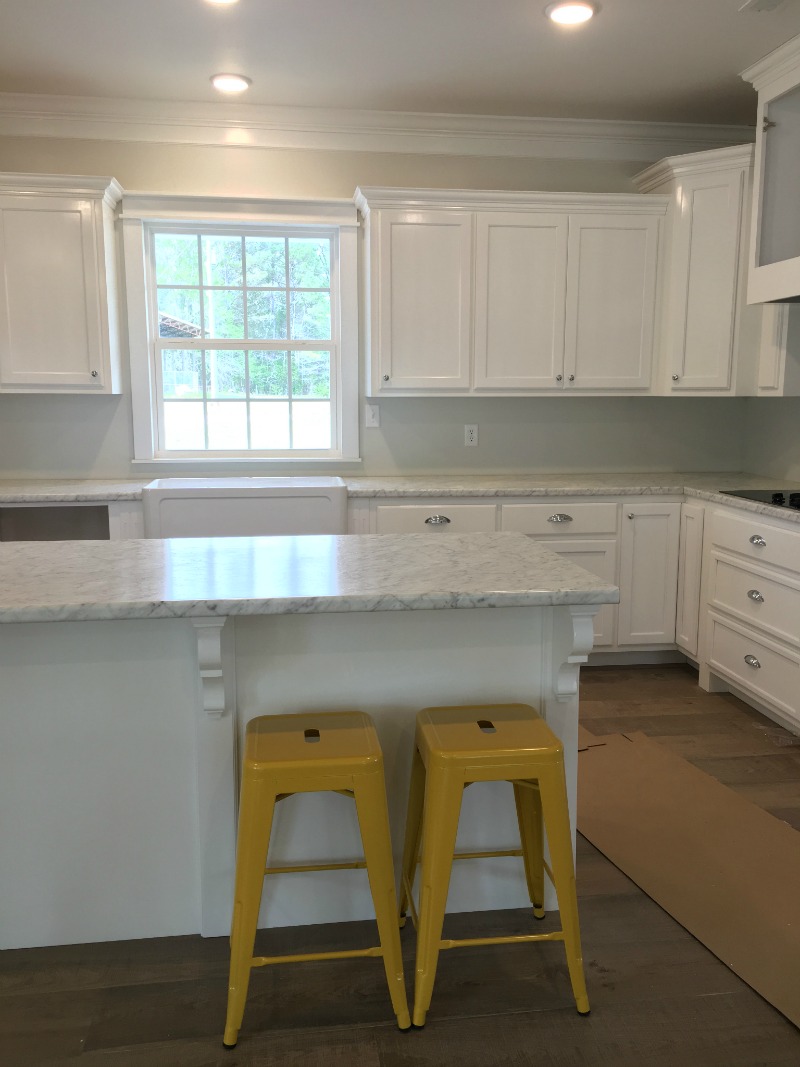
Those yellow stools look so gorgeous in photos, but in reality, they come off more mustard/gold in color.  I’m considering painting them a bright turquoise color.  That goes on the bottom of our to-do list though, so who knows when it will actually happen.  =)

The door to the right of the fridge leads to our mudroom.  It usually stays open, and so far, the majority of our guests come in that way.

Farmhouse Kitchen Tour

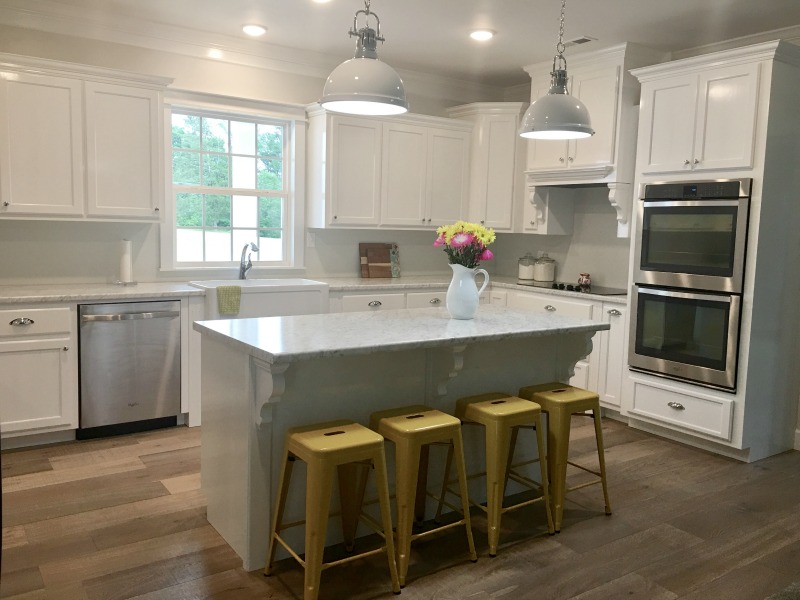
I am really loving my double-ovens.  I didn’t know how often I would use them, but I have cooked something in both of them for almost every meal so far.

Farmhouse Kitchen Tour

Farmhouse Kitchen Tour

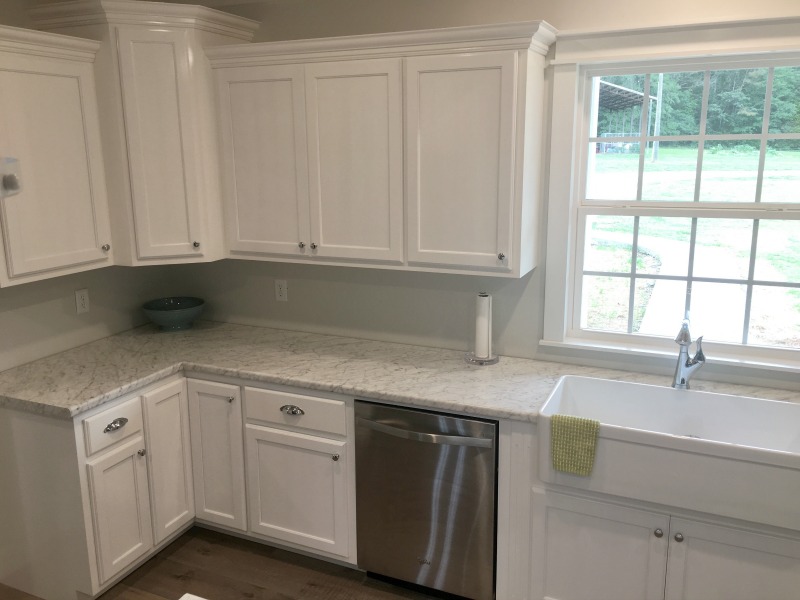
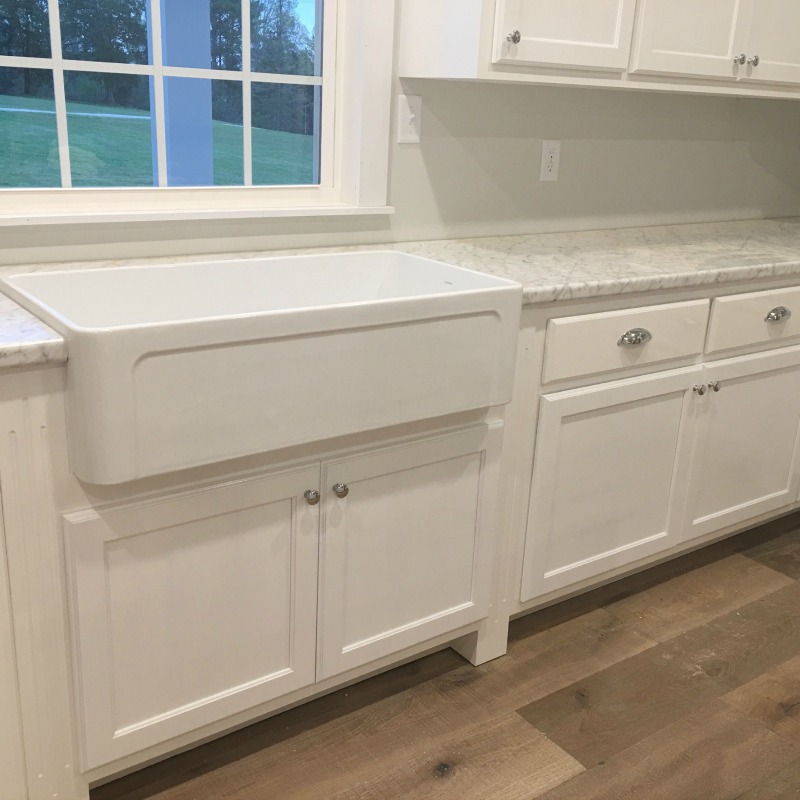
When I first began dreaming of my farmhouse kitchen, I knew I wanted a big apron-front, white fireclay sink.  I searched everywhere.  When I found this one at Quality Bath, I knew I wanted it in my farmhouse kitchen.

Farmhouse Kitchen Tour

Farmhouse Kitchen Tour

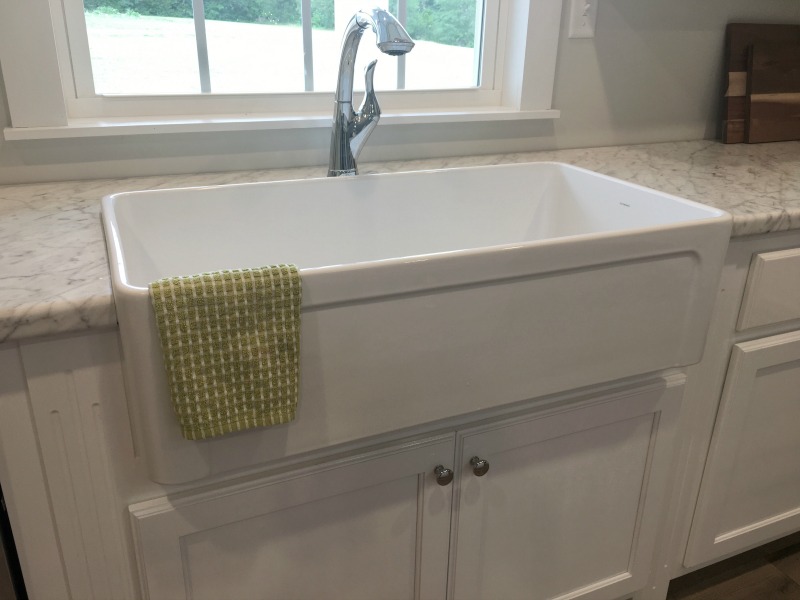
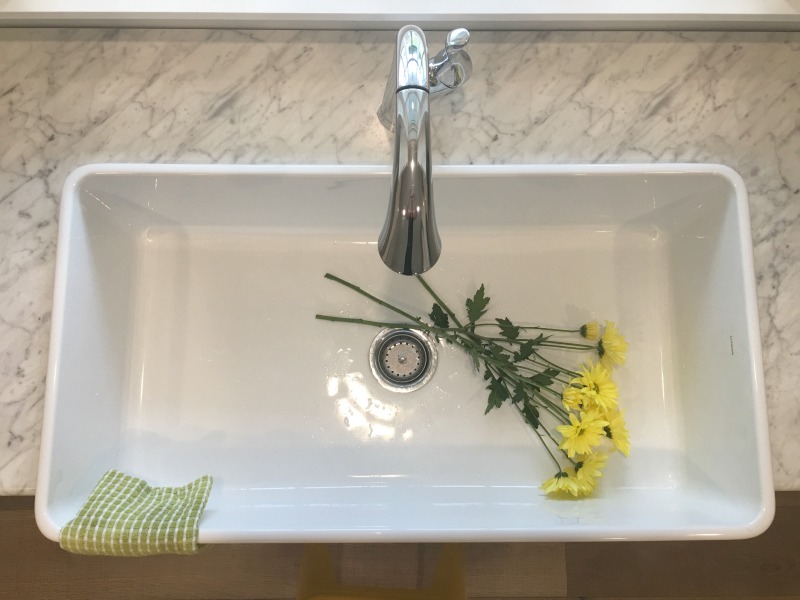
It’s 36 inches wide and a single bowl.  I don’t wash many dishes by hand, but on the rare occasion that I do, the single bowl works fine.  It’s width allows me to wash on one side and rinse on the other.

I am extremely pleased with the quality and service from Quality Bath.  My sink was delivered within two weeks of ordering.  It is extremely heavy and very durable.  The fireclay feels like it would chip easily, but so far, it is holding up really well (even with three kids tossing in dishes every day!).

Farmhouse Pantry:

Farmhouse Kitchen Tour

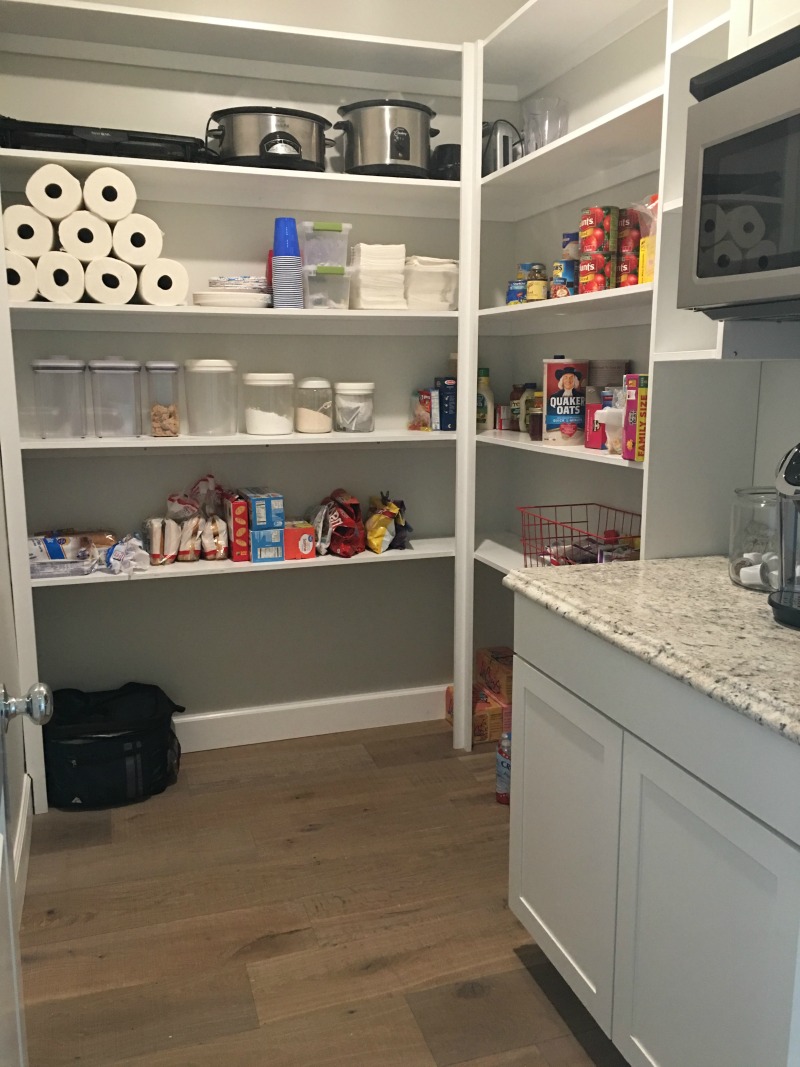
In addition to the usual suspects (you know, food) our pantry hosts the microwave, toaster, and my Keurig coffee maker.  I love that these small appliances can stay out and easily accessible, but still hidden from view.

Farmhouse Kitchen Tour

I think I’ll put some decorative plates on those little shelves on the sides of the microwave.  Maybe some of my painted pottery pieces or something.  Right now, there is nothing in the cabinets below or above the microwave, but I’m sure I’ll find something to go there eventually!

Farmhouse Kitchen Tour

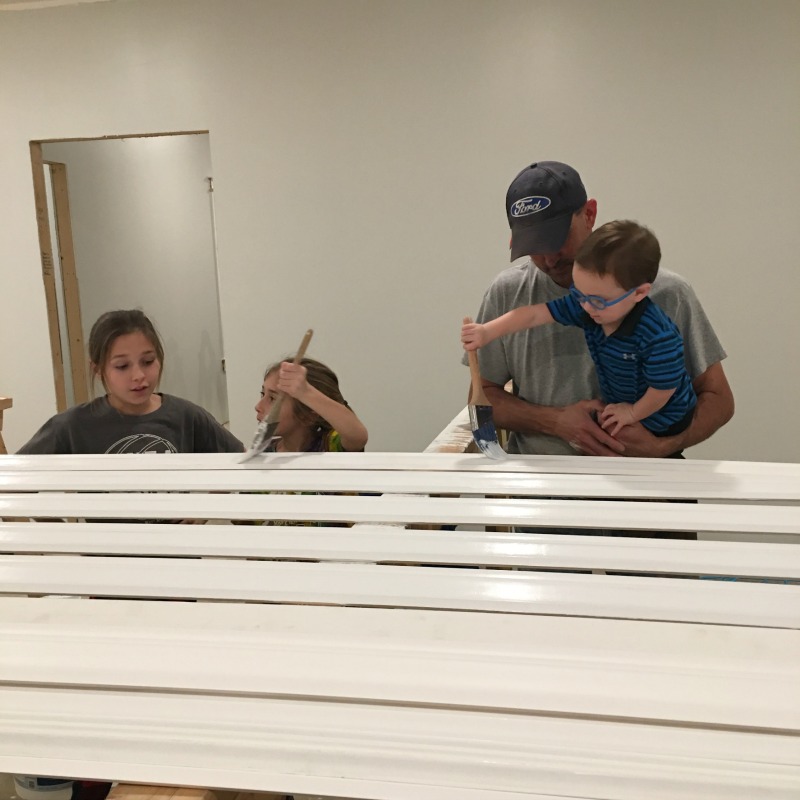
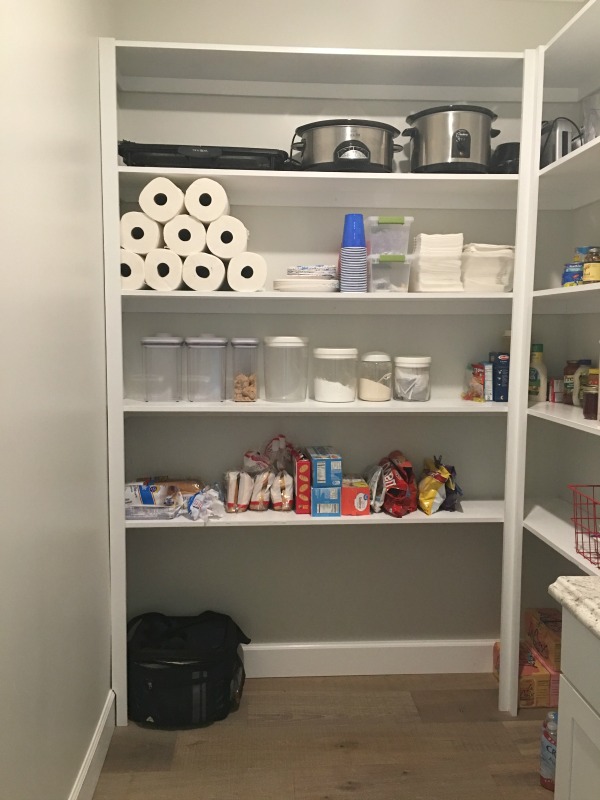
Justin and my dad built these shelves and I adore the way they turned out.  Those OXO containers (the three on the left) are my favorite.  They are a bit pricey, though, so I’m slowly adding to my collection.

We are relishing being in our new home and this space is definitely one of the most-used.  Having the tools and space needed to cook actually makes me enjoy cooking!

Disclaimer:  This post is in partnership with Quality Bath.  As always, all opinions are my own.

Forever Farmhouse Update No. 9

farmhouse updateYou guys, I apologize for the lack of posts. We are in a mad rush to get this house completed and it is taking up every free second that I have.  Next Wednesday or Thursday, we will have our final inspection. Then, on May 23 we are closing on this bad boy!! Praise JESUS, am I right? =)

Installing the garage doors was quite an event. If you’ll remember, we are currently living in what will be the future garage. On Tuesday, we cut out the holes where our garage doors would go. It went from this:

To this:

And finally, on Thursday, to this:

We spent Tuesday and Wednesday nights with a sheet of plastic separating us from the great outdoors. It was great! =)

Our cabinet guy built and installed the closet units for our master closets.  We have his and hers closets, which was one of my “must-haves”  WAY back at the beginning of this whole process.  I opted for shelving and drawers, so my closet looks like this:

Justin just wanted shelves, with no drawers.  His closet looks like this:

Today, Justin is working on leveling up the front yard and spreading out hay.  Since we are out in the county, we don’t have to do any “real” landscaping right away.  I hope to have our local nursery come out and give me suggestions as to what I should plant, and where.

This weekend we are hitting the ground running–finished up the last remaining tasks and hopefully, getting most everything cleaned up and ready to move in.  The concrete people are coming next week to pour our sidewalks and a slab for us to park on.  I am super excited about molding the kids’ handprints into the concrete–how funny is that?

Kyndall and I made a spontaneous stop by Southern Style Furniture earlier this week and found the perfect living room set, so that’s another item marked off my list!  I have fingers crossed that as soon as we close on the 23rd, we can start moving in and getting settled.  YAY!

Our running to-do list:

  • Clear land. completed August 25, 2016
  • Pour footer. completed August 30, 2016
  • First plumbing and electrical rough-in. completed September 7, 2016
  • Pour slab. completed September 10, 2016
  • Framing. started October 3 and completed October 20, 2016
  • Roofing. completed October 30, 2016
  • Second plumbing rough-in. completed November 11, 2016
  • HVAC rough-in. completed November 17, 2016
  • Brick skirt and steps. completed November 18, 2016
  • Vinyl siding. completed March 9, 2017
  • Garage doors. completed March 11, 2017
  • Electrical. completed December 5, 2016
  • Hang insulation. completed December 15, 2016
  • Final plumbing (connect toilets, sinks, dishwasher, etc.)  completed April 25, 2017
  • Install and finish sheetrock.  completed January 13, 2017
  • Install crown molding and window trim. completed April 5, 2017
  • Tile shower. completed March 2, 2017
  • Paint.  completed February 7, 2017
  • Install lights. partially completed–most of the lights are in, just not all.
  • Floors. completed March 25, 2017
  • Install flooring trim. mostly completed.
  • Install stair and balcony railing.  mostly completed
  • Cabinets.  completed April 12, 2017
  • Hang bathroom mirrors. partially completed
  • Install closet hardware. partially completed.  Our closets are finished, just not the kids’ closets.
  • Touch-up paint.
  • Clean.
  • Move in.
  • Host all-the-things. =)

Farmhouse Master Bathroom Update

Farmhouse Master Bathroom

This post in partnership with Floor & Decor.

You guys! Our plumber came yesterday and installed all of our toilets, hooked up all the faucets, and finished all the other plumbing things. We now have working bathrooms and running water and are even closer to being finished with our forever farmhouse! YAY!

Today, I am sharing our farmhouse master bathroom update with you. I was super excited to be able to partner with Floor & Decor on the tile for our floor and shower. If you are ever building and/or remodeling and need new flooring, check them out for sure!  I went for a store tour several months ago and was amazed at their selections.

Walk-In Shower:

Farmhouse Master Bathroom

Farmhouse Master Bathroom

Farmhouse Master Bathroom

Just so you know, all white tiles are not the same.  Floor & Decor’s subway tile is the brightest, cleanest white available on the market.  When I picked up subway tile samples from other stores, they were much more yellow/ivory in color.

Double Vanity:

Farmhouse Master Bathroom

One thing missing from this room still are mirrors.  I haven’t quite decided if I want to go with one big mirror all the way across the length of the vanity or two smaller mirrors with some decorative piece in the middle.  (Feel free to leave me your opinion in the comments!)  We have these lights to go above the sinks, but they haven’t been installed yet.

PS: If I were a professional blogger, I would have cleaned those floors before taking this picture.  {Hides face in embarrassment.}

Soaking Tub:

The only other item still needing to be completed is the tile around the tub.  We will use the same white subway tile to build a backsplash around our soaking tub to help protect the walls.

I can’t wait to be settled in and getting ready in this bathroom.  I dream of long soaks in that tub with candles and a book, but let’s be realistic–I have kids and that probably won’t happen for a while =)  Maybe I can at least squeeze in some steamy, relaxing showers of a morning though, which is the next best thing!

*This tile project and post in partnership with Floor & Decor.  The tile for this project was complimentary but all opinions are my own.

Forever Farmhouse Update No. 8

forever farmhouse

forever farmhouseWell friends, the end is in sight.  We have locked in an interest rate and have less than 60 days until closing.  (We can close sooner than that, but if we aren’t finished within 60 days there is a pretty substantial fee!)  Now is when things really start coming together.  Instead of a few big projects, there are hundreds of little projects.  But let me catch you up.  In my last update, the tile floors were installed but not grouted, window trim was complete, and we were working on crown molding.

If you follow me on Instagram, you know that interior doors and cabinets have since been delivered.  We had a little issue with kitchen countertops–they were a special order top and our cabinet guy didn’t realize that, so he didn’t order them with that in mind.  When he called to order a few weeks ago, they informed him that it would take 4-6 weeks to get them in.  THANKFULLY, they were delivered three weeks from the order date and are already installed and ready to go! YAY!

forever farmhouse

Baseboard is down in about half of the house.  Painting baseboard is a family affair around here 🙂

ALL our flooring is installed and complete now! YAY!

forever farmhouse

forever farmhouse

Kitchen cabinets are completely installed.  I purchased these yellow barstools (I have four of them) severla months ago, but not I am thinking they look too mustard-y instead of the bright yellow I was hoping for.  I’m considering painting them.  What do you think?forever farmhouse

Our fireplace and built-ins are complete, except for a transitional piece of hardwood to go around the tile on the floor.  Our TV will go above the fireplace, where those wires are hanging out.

The plumber is coming out next week to take care of all the final plumbing tasks:  installing toilets, faucets, sinks, etc.  Garage doors are going in next week and the vinyl on that side of the house will go up as well.  (Yes, we will be living in the garage with actual garage doors until we close on the house.  Fun times!)

I’ve had to add a few things (again) to our running to-do list.  Some of those little things like bathroom mirrors, closet hardware, and the like.  Today starts Justin’s long weekend off and we (myself and kids included!) plan to work our fingers to the bone to get as much finished as possible.  We are starting to feel the finish line stress just a little 😉

Our running to-do list:

  • Clear land. completed August 25, 2016
  • Pour footer. completed August 30, 2016
  • First plumbing and electrical rough-in. completed September 7, 2016
  • Pour slab. completed September 10, 2016
  • Framing. started October 3 and completed October 20, 2016
  • Roofing. completed October 30, 2016
  • Second plumbing rough-in. completed November 11, 2016
  • HVAC rough-in. completed November 17, 2016
  • Brick skirt and steps. completed November 18, 2016
  • Vinyl siding. near completion.
  • Garage doors.
  • Electrical. completed December 5, 2016
  • Hang insulation. completed December 15, 2016
  • Shutters.
  • Final plumbing (connect toilets, sinks, dishwasher, etc.)
  • Install and finish sheetrock.  completed January 13, 2017
  • Install crown molding and window trim. completed April 5, 2017
  • Tile shower. near completion.
  • Paint.  completed February 7, 2017
  • Install lights. partially completed–all our can lights are in, but nothing else.
  • Floors. completed March 25, 2017
  • Install flooring trim. in progress
  • Install stair and balcony railing.
  • Cabinets.  completed April 12, 2017
  • Hang bathroom mirrors.
  • Install closet hardware.
  • Clean.
  • Move in.
  • Host all-the-things. =)

Farmhouse Kitchen Organization: Help Needed!

Farmhouse Kitchen

Happy Friday, friends! The cabinet guys are coming today to install our oven pantry, vent hood, and cabinet doors–YAY!  Our own forever farmhouse is getting so much closer to completion.  I have a full update planned for you next week, but today, I need your help organizing this farmhouse kitchen.  (I’m sharing all these door-less photos because I thought that would be easier for you to tell what everything looks like, storage-wise!)

If you follow me on Instagram, you probably saw a few videos and photos of the installation process.  If not, let me catch you up:

Farmhouse Kitchen

Farmhouse Kitchen

Farmhouse Kitchen

The island has pull-out trash cans in the center and full drawers on each side.

I have a confession:  I don’t know what to do with all those cabinets! What goes where?  I would LOVE your farmhouse kitchen organization help!

Farmhouse Kitchen

Leave a comment with the cabinet or drawer number(s) and what you think should go in that cabinet!  I’ll be forever grateful 🙂


Forever Farmhouse Friday Update No. 7

farmhouse update

farmhouse updateHappy Friday, friends! I am SO very ready for the weekend! Justin took off from his real job this week to work on the house and he was able to get a lot accomplished! Yay for that!  So, let’s get on with the 7th edition of our forever farmhouse update!

farmhouse updateAll the wall painting is complete. (I say wall painting because after all the trim is installed, it will have to be caulked and re-painted.) I will do a whole-house paint color post after we get settled, but most of our house is painted Gray Owl by Benjamin Moore, at half-tint. This picture is a (low-quality) image of Jase’s bedroom.

farmhouse updateKyndall wanted a bright blue for her bedroom. You can’t tell, but we used Valspar Paint Flakes on one of her walls in an attempt to make it a glitter wall. It was a flop, but not so much that we have to repaint anything. It’s just not quite the glitter look we were going for.

farmhouse updateLibby requested purple walls. We made the same sad attempt at a glitter wall in here and if you tilt your head juuuussst right, you might can spot some specks of glitter. Maybe.

farmhouse updateThe tile in the girls’ bathroom is down, but not grouted. They have a Jack-and-Jill layout in their bathroom, so the toilet and tub areas are both separate but they share the vanity space.

farmhouse updateThe tile in Jase’s bathroom is down, but not grouted.

farmhouse updateOur tile in the master shower is mostly installed, with the exception of just a few ceiling pieces. It still needs to be grouted, too.

farmhouse updateOur master bathroom floor tile is also down, but not grouted.  Justin and my dad are moving right along with our trim. For the windows, I wanted a super simple craftsman trim look.  You can catch a glimpse of the window trim in the above photo.

farmhouse updateWe are doing the “poor man’s trim” method to make our crown molding look bigger.  We nailed in a regular piece of crown molding at the top, skipped about 3 inches of wall space, and nailed in a smaller piece of crown.  We then painted the entire section to resemble one piece of extremely thick crown molding.  That’s coming along nicely.

This weekend, we are hoping to get the rest of the crown molding installed and start on the flooring! It’s so hard to nail down an official completion date because Justin and my dad are doing all this work in the evenings, after their “real” jobs.  Some days they get lots of time and work in and some days they have other tasks to tend to.  Right now, we are shooting for the end of March.  Fingers crossed we have lots of productive days over the next few weeks!

Disclaimer:  By “we” in the above post, I mostly mean Justin and my dad.  They are the real work-horses on this house project.  I am the chief design decision maker and wall switch plate installer and house cleaner.  They do every single other thing.  

Also, Justin’s dad and my Papa have been a huge help, and our brother-in-law Luke is coming this weekend to help tackle the flooring!

Our running to-do list:

  • Clear land. completed August 25, 2016
  • Pour footer. completed August 30, 2016
  • First plumbing and electrical rough-in. completed September 7, 2016
  • Pour slab. completed September 10, 2016
  • Framing. started October 3 and completed October 20, 2016
  • Roofing. completed October 30, 2016
  • Second plumbing rough-in. completed November 11, 2016
  • HVAC rough-in. completed November 17, 2016
  • Brick skirt and steps. completed November 18, 2016
  • Vinyl siding. near completion.
  • Electrical. completed December 5, 2016
  • Hang insulation. completed December 15, 2016
  • Shutters.
  • Install and finish sheetrock.  completed January 13, 2017
  • Install crown molding and window trim. in progress
  • Tile shower.
  • Paint. completed February 7, 2017
  • Install lights. partially completed–all our can lights are in, but nothing else.
  • Floors. in progress.
  • Install flooring trim.
  • Install stair and balcony railing.
  • Cabinets.
  • Clean.
  • Move in.
  • Host all-the-things. =)

If you’ve been keeping up with these posts, you may notice that I added a few things to our running list.  I had neglected to add smaller tasks such as installing trim and stair railings.  I have added those tasks to show a more realistic picture of what we have left to complete.

Farmhouse Entry Door Shopping + Choosing Ours

Disclaimer:  If you are an email subscriber and you received this post twice, I apologize.  Due to a WordPress error (or most likely, a WordPress user error), this post was sent out in email but never posted.  Oops!

One of the first things we needed to pick out for our forever home was the entry door. I love the look of double doors and I knew I wanted lots of glass. (We are way off the road, so I don’t have to worry so much with Peeping Tom’s. Plus, I’m pretty sure I’ll know you are there before you make it to my door because of Max.)

The first thing I did, of course, was a Pinterest search for farmhouse entry doors. Because how you choose things for your house without a Pinterest search, I’ll never know.

Entry Door

One thing I learned in my search for farmhouse entry doors is that none of the online sellers list actual prices for the doors.  It was so frustrating to fill out a contact from and request a price, only to find out that a particular door was WAY over our budget.
Entry Door

I prefer simple, squared doors rather than the ornate rounded ones.  The doors with arched tops are gorgeous, they just aren’t us.  

Entry Door

After gathering lots of Pinterest farmhouse entry door inspiration, I went to our local building supply store.  I priced similar doors from them and compared those prices to the ones from Lowe’s and Home Depot.  Our building supply store won by a land-slide, and I ordered our front doors from them.

I chose wood-look fiberglass material for our entry door.  We have painted them once, but they still need a second coat.(full tutorial on that coming soon!).

farmhouse entry doors

Even without the final coat of paint, and with the red mud all over the concrete (how about those dog prints??), I already love our farmhouse entry doors!

If you are in the North Alabama area, we ordered these from Littrell Lumber Mill and were very pleased with the product and the price.  This is not a sponsored post by them–I just wanted to give them a shout-out!

Bible Verses for A New Home: Write It On The Walls

Bible Verses For A New Home

Bible Verses For A New HomeI cannot put into words how blessed I felt when my parents and sister hosted a Scripture Writing party for our new home. Family and friends took time out of their busy schedules to come shower our new home with bible verses and prayer. It was the greatest feeling. I walked around my house for days after the party just crying, and I am not a crier.

I wanted to share some of those verses with you, in case you are building a new home and need ideas. Or even if you aren’t building a new home and want to put them in vinyl or paint them on your walls.

Bible Verses for A New Home

  • Choose this day whom you will serve, but as for me and my house we will serve the Lord.  Joshua 24:15
  • Learn to do good, seek justice, correct oppression, bring justice to the fatherless, plead the widows cause. Isaiah 1:17
  • Do not forget to show hospitality to strangers, for by doing so, some people have shown hospitality to angels without knowing it! Hebrews 13:2

Bible Verses for a new home

  • Now therefore, let it please you to bless the house of your servant, that it may continue to before you forever.  For you, O Lord God, have spoken it, and with your blessing let the house of your servant be blessed forever.  2 Samuel 7:29
  • God is our refuge and our strength.  Psalms 46:1

Bible Verses for a new home

  • Peace be to you, and peace be to your house, and peace be to all that you have. 1 Samuel 25:6
  • And now these three remain:  faith, hope, and love.  But the greatest of these is love. 1 Corinthians 13:13
  • Taste and see that the Lord is good.  Psalms 34:8
  • For I am the Lord your God who takes hold of your right hand and says to you “Do not fear, I will help you.”  Isaiah 41:13
  • Children are a gift from the Lord;  they are like arrows in a warriors hands.  Psalm 127:3-5

Bible Verses for New Home

  • So do not worry about tomorrow, for tomorrow will care for itself.  Matthew 6:34
  • As iron sharpens iron, so a friend sharpens a friend.  Proverbs 27:17
  • For God so loved the world that He gave His only Son, so that whoever believes in Him shall not perish but have eternal life.  John 3:16
  • For where two or three are gathered in my name, there I am among them.  Matthew 18:20
  • Everyone who hears these words of mine and does them will be like the a wise man who built his house on the rock.  Matthew 7:24Bible Verses for New Home

And a few photo collages, for my memory’s sake 🙂

Floor & Decor Store Tour

floor and decor store tour

This post is sponsored by Floor & Decor.  As always, all opinions are my own.

floor and decor store tourWe are nearing the point in our house-building process where we are installing things–flooring, wall tile, cabinets.  After finding tons to love on the Floor & Decor website, I reached out to them about a blog partnership and they agreed!!  They invited me up for a full Floor & Decor store tour and I was, quite literally, floored (pun intended!).  We found every single thing we needed….. and more.

Floor & Decor has over 60 stores across the United States.  They carry hundreds of different flooring options–ceramic, porcelain, travertine, marble, hardwood, bamboo, and laminate.  They also carry a wide variety of back-splash materials, sinks, tools, and counter-tops.  All your flooring and decor’ing needs (<–I’m on a roll today, y’all!).

The Tour.

When Justin and I arrived for our Floor & Decor store tour, we were greeted by the store manager and the design team specialist.  Floor & Decor has in-store designers who will work with you on any project, for free.  Our designer, Theresa, was a huge help when it came to picking out tile and designing our master bath, which is the project we are partnering on.

If you are anything like me and struggle with visualizing things, Floor & Decor is the store for you.  Throughout the store, there are displays of miniature rooms to help you see what different flooring/tiles/grouts look like together.

Theresa sat down with us and went over our measurements and vision.  She walked around the store with us and pulled items that she felt matched the vision I had.  We spent the morning making different arrangements of floor tile and wall tile and pencils and decorative pieces.  It was so much fun and I was able to see the project even better.

Theresa pulled out these tiny pieces of grout samples so that I could select our grout color easier.  Being able to see the actual grout with our tile choice made me so much more confident in my decision!

As we were walking out, I spotted this clearance tile and fell in love!  I knew it would look just fantastic in our laundry room in a herringbone pattern.  And do you see that price tag?  That’s 88 cents per square foot… not bad Floor & Decor, not bad.

I can’t wait to share our master bathroom project with you, but in the meantime, if you have any of your own projects going on, I suggest a visit to Floor & Decor.

Forever Farmhouse Friday Update No. 6

farmhouse update

farmhouse update

We are slowly ticking through our forever farmhouse checklist over here.  Please pay attention to those columns on the front porch.  Don’t they look so much better than those 2×4’s from the last farmhouse update?  We also installed our lantern lights there by the front door and one more by the side door.

farmhouse

Our porch ceilings make me so happy.  The front porch is covered in blue slated vinyl.  The back porch is covered with corrugated metal.  I love how the different materials/colors add interest to our outdoor living spaces, where I am sure we will spend 90 precent of our time!

Our exterior lights are all installed–LED canlights, two outdoor ceiling fans, and the lanterns by the doors.  The HVAC is connected, so now we can heat (or cool) the house while we are painting.

Our sheetrock is complete and after several nights of Justin and my dad coming in looking like ghosts (from all the sheetrock dust), the house is finally clean enough to start painting!  They actually started the primer on the ceilings a bit last night, but they will do more paint this weekend.  We are also planning to start the tile in our shower and bathrooms this weekend. (And by we, I mean Justin.)

We are aiming for an early March move-in date, so fingers crossed everything works out and we can make that!

Our running to-do list:

  • Clear land. completed August 25, 2016
  • Pour footer. completed August 30, 2016
  • First plumbing and electrical rough-in. completed September 7, 2016
  • Pour slab. completed September 10, 2016
  • Framing. started October 3 and completed October 20, 2016
  • Roofing. completed October 30, 2016
  • Second plumbing rough-in. completed November 11, 2016
  • HVAC rough-in. completed November 17, 2016
  • Brick skirt and steps. completed November 18, 2016
  • Vinyl siding. near completion.
  • Electrical. completed December 5, 2016
  • Hang insulation. completed December 15, 2016
  • Shutters.
  • Install and finish sheetrock.  completed January 13, 2017
  • Tile shower.
  • Paint.
  • Install lights.
  • Floors.
  • Cabinets.
  • Clean.
  • Move in.
  • Host all-the-things. =)